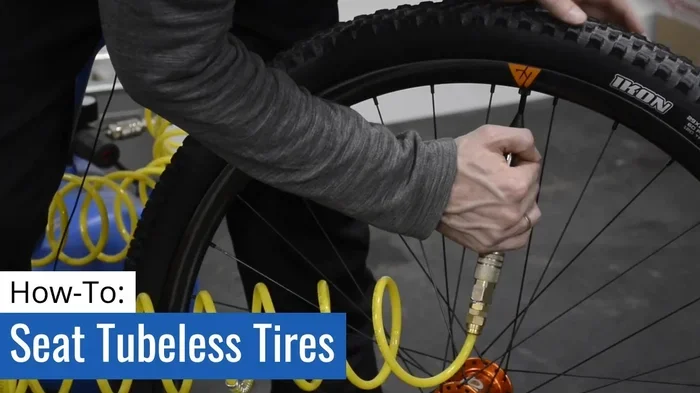
Learn How to Seat a Tubeless Tire Without Compressor
Seating a tubeless tire without a compressor is easier than most people think. You can use a floor pump, CO2 cartridges, or even a ratchet strap method to get the tire bead locked in place. This guide walks you through every technique, tool, and tip you need to seat a tubeless tire without a compressor quickly and safely.
This is a comprehensive guide about how to seat tubeless tire without compressor.
Key Takeaways
- Multiple Methods Work: You can seat a tubeless tire without a compressor using a floor pump, CO2 cartridges, ratchet straps, or even a bucket of water.
- Preparation Is Key: Proper rim tape, valve stem placement, and soapy water lubrication make the process much smoother.
- Avoid Common Mistakes: Over-inflating too fast, skipping rim tape, and using the wrong sealant can cause seating failures.
- Safety Comes First: Always wear safety glasses and work on a stable surface when seating tubeless tires.
- Know When to Upgrade: If you frequently work with tubeless tires, investing in a small portable compressor saves time and effort.
[FEATURED_IMAGE_PLACEHOLDER]
Why You Might Need to Seat a Tubeless Tire Without a Compressor
Tubeless tires have changed the game for cyclists, off-road drivers, and motorcycle riders. They offer better traction, fewer flats, and a smoother ride. But here is the problem. When you need to seat a new tubeless tire, most people reach for an air compressor. What happens when you do not have one?
Maybe your compressor is broken. Maybe you are on a trail miles from the nearest outlet. Or maybe you simply do not own one yet. Whatever the reason, learning how to seat a tubeless tire without compressor is a valuable skill. It saves you time, money, and a lot of frustration.
The good news is that several proven methods work without any compressed air machine. From simple floor pumps to clever tricks using household items, you have options. This guide covers each method in detail so you can pick the one that works best for your situation.
Whether you are dealing with a tubeless tire setup on your mountain bike, ATV, or car, the principles stay the same. You need enough air pressure to push the tire bead against the rim wall and create a tight seal. Let us explore how to achieve that without a standard compressor.
Before we dive in, let us quickly cover what you need to understand about how the tire bead works. The bead is the stiff edge of the tire that locks onto the rim. When you inflate the tire, air pressure pushes the bead outward against the rim. Once the bead seats properly, it holds air without any tube. That is the goal. And there are several ways to reach it.
Understanding the Basics of Tubeless Tire Seating
How the Tire Bead Creates a Seal
The tire bead is the hardened edge that sits on the rim. When you inflate the tire, air pressure forces the bead to expand outward. As it presses against the rim shoulder, it forms an airtight seal. This is what makes tubeless tires work without an inner tube.
Seating the bead requires a sudden burst of air pressure. That is why compressors are popular. They deliver a quick surge of air that pops the bead into place. But you can achieve similar results with other tools and techniques. The key is creating enough pressure fast enough to push the bead over the rim edge.
Why Seating Fails Sometimes
Sometimes a tubeless tire will not seat no matter how hard you try. Common reasons include:
- Improper rim tape: If the tape is not centered or is damaged, air leaks at the spoke holes.
- Wrong valve stem: A loose or incorrect valve stem prevents a proper seal.
- Dry bead: Without lubrication, the tire bead grips the rim instead of sliding into place.
- Low tire pressure: Not enough air volume to push the bead fully onto the rim shoulder.
- Tire and rim mismatch: Some tire and rim combinations are harder to seat than others.
Understanding these failure points helps you avoid them. It also makes the seating process much more predictable and successful.
Tools and Materials You Will Need
You do not need a lot of gear to seat a tubeless tire without a compressor. Here is what you should gather before you start:
- Floor pump with a tubeless head: This is your most important tool. Make sure it has a high-pressure gauge and a tight seal on the valve.
- Soapy water or tire sealant lubricant: A simple mix of dish soap and water helps the bead slide into place.
- Rim tape: Make sure you have the correct width for your rim. Tubeless-specific rim tape works best.
- Tubeless valve stem: Check that your valve stem fits your rim hole correctly.
- Tire levers: Plastic levers help you get the tire onto the rim without damaging the rim tape.
- Sealant: Tubeless sealant fills small gaps and prevents air leaks after seating.
- CO2 cartridges (optional): These provide a quick burst of air and work great as a backup.
- Ratchet strap or bungee cord (optional): Useful for the strap method of seating.
Having everything ready before you start saves time and keeps your workflow smooth. You do not want to stop midway because you are missing a key piece of equipment.
Step-by-Step Guide to Seating a Tubeless Tire Without Compressor
Step 1: Prepare the Rim
Start by cleaning the rim bed thoroughly. Wipe away any dirt, old tape, or residue. Next, apply fresh rim tape over the spoke holes. Wrap the tape tightly and evenly around the entire rim bed. Make sure there are no gaps or bubbles.
Punch the valve stem hole through the tape using a sharp tool or the valve stem itself. Insert the tubeless valve stem from the inside of the rim. Secure it with the locking nut. Tighten it firmly but do not over-tighten. You want a snug fit that prevents air from leaking around the stem.
Step 2: Apply Soapy Water to the Bead
Mix a few drops of dish soap with water in a small spray bottle. Spray the soapy solution generously onto the tire bead and the rim lip. This lubrication is critical. It helps the bead slide into position instead of gripping the rim.
You can also apply a thin layer of sealant directly to the bead if your sealant is thin enough. This adds an extra layer of protection against air leaks once the tire is seated.
Step 3: Mount the Tire onto the Rim
Use tire lever tools to carefully mount one side of the tire onto the rim. Start at the valve stem and work your way around. Once one side is fully seated on the rim, add sealant to the tire through the valve stem. A typical amount is about 2 to 4 ounces depending on the tire size.
Now mount the second side of the tire. Work it onto the rim by hand as much as possible. Use tire levers only when necessary. Be careful not to pinch the rim tape or push the valve stem out of place.
Step 4: Choose Your Seating Method
This is the most important step. Here are the best methods to seat a tubeless tire without a compressor. Each one has its strengths, and we will walk through them below.
Step 5: Check for Proper Seating
After seating, spin the tire slowly and listen for any air escaping. You can also spray soapy water around the bead and valve stem. If you see bubbles forming, the seal is not complete. You may need to add more air or adjust the bead.
Once the tire holds air, inflate it to the recommended tire pressure for your application. Check that the bead remains seated all the way around. A properly seated tubeless tire should have a tight, even seal with no visible gaps.
Method 1: Using a Floor Pump for Tubeless Tire Seating
A high-volume floor pump is the most accessible tool for manual tire inflation. The key is to use a pump with a tubeless-specific head that creates a tight seal on the valve. Here is how to do it.
First, make sure your pump head is firmly attached to the valve stem. Push down hard and fast on the pump handle several times. You want to build pressure quickly. The sudden burst of air often pops the bead into the rim groove.
You may hear a loud pop or feel the tire snap into place. This is the bead seating. If you do not hear anything after several pumps, try adding more soapy water and pumping again. Sometimes it takes 10 to 15 strong pumps to get the bead over the rim.
Quick Tip: If your floor pump has a pressure gauge, watch it closely. You do not want to exceed the tire’s maximum pressure while trying to seat the bead. Once the bead pops into place, you can safely adjust the pressure to the recommended level.
Method 2: The CO2 Cartridge Burst Method
CO2 cartridges are a popular choice for quick tubeless tire seating. They deliver a fast, concentrated burst of air that is often enough to pop the bead into place.
Here is how it works. Screw a CO2 inflator onto your valve stem. Attach a fresh CO2 cartridge. Press the trigger to release the gas quickly. The rapid inflation often seats the bead instantly.
This method works great for mountain bikes and smaller tires. For larger tires like those on cars or trucks, you may need multiple cartridges. Always wear safety glasses when using CO2 cartridges. The sudden burst of air can sometimes cause the tire to pop off the rim if the bead is not aligned properly.
Method 3: The Ratchet Strap Technique
The ratchet strap method is a clever trick that uses mechanical force to push the tire bead into the rim. This works well when you do not have access to a pump or cartridges.
Start by wrapping a ratchet strap around the tire at the widest point. Tighten the strap as much as possible. The strap compresses the tire, forcing the bead outward against the rim. As the strap tightens, the bead should pop into the rim groove.
Once you hear the bead seat, carefully remove the strap. You can then add air through a small hand pump to bring the tire to full pressure. This method is especially useful for wider tires and motorcycle wheels.
Method 4: The Bucket or Bucket-Style Air Method
This unconventional method uses water pressure to seat the tire bead. Fill a bucket with water and submerge the tire and rim assembly. Then, forcefully push the tire into the water. The water pressure forces air into the tire and pushes the bead into place.
This method takes some effort but can be surprisingly effective. It is especially useful for ATV and UTV tires where the bead is very tight. Just make sure your valve stem is sealed properly before you start, or you will just be filling the bucket with water.
Comparison of Tubeless Tire Seating Methods
| Method | Equipment Needed | Best For | Speed | Success Rate |
|---|---|---|---|---|
| Floor Pump | High-volume pump | Bicycle and motorcycle tires | Moderate | High |
| CO2 Cartridges | CO2 inflator and cartridges | Quick roadside repairs | Fast | Very High |
| Ratchet Strap | Ratchet strap or bungee cord | Wide tires and ATVs | Slow | Moderate |
| Bucket Method | Bucket and water | Large off-road tires | Slow | Moderate |
Each method has its place. The floor pump is the most practical for everyday use. CO2 cartridges are best for emergencies. The ratchet strap and bucket methods are great backup options when you are far from any air source.
Common Mistakes That Prevent Proper Bead Seating
Even with the right method, mistakes can cause seating failures. Here are the most common ones to avoid:
- Skipping rim tape: This is the number one cause of air leaks. Always use fresh, properly sized rim tape.
- Not enough soapy water: Dry beads grip the rim. Lubrication is essential for smooth seating.
- Over-tightening the valve stem: This can damage the rim tape or crack the rim.
- Using the wrong sealant amount: Too little sealant will not fill gaps. Too much can make a mess and clog the valve.
- Inflating too slowly: A gradual air increase does not create the pressure burst needed to pop the bead into place.
Expert Insight: Many experienced riders recommend pre-seating one side of the tire completely before adding sealant. This gives you a tighter starting point and makes the second side much easier to mount. It also reduces the chance of the bead slipping during inflation.
When to Consider Getting a Portable Compressor
While knowing how to seat a tubeless tire without a compressor is incredibly useful, there are times when owning a compressor makes life much easier. If you frequently work with tubeless tires, a small portable air compressor can save you significant time and effort.
Portable compressors are affordable and compact. They fit in your garage, truck bed, or even a large tool bag. Many models deliver enough air volume to seat even the tightest tubeless tire beads in seconds.
If you already own a generator, you can power a compressor at home or at your job site. Understanding how does a generator work helps you choose the right model for powering air tools. You can also learn how to connect a generator to your house without a transfer switch to set up a convenient tire work station.
For those planning a generator setup, knowing how many watt generator do I need ensures you get a unit powerful enough to run your compressor without overloading the system. A small 1000 to 2000 watt generator is usually sufficient for most tire inflation tasks.
Once you have your generator running, learning how to start a generator properly will protect both the generator and your compressor equipment. Always follow the manufacturer’s instructions for safe startup and operation.
Maintaining Your Tubeless Setup After Seating
Once your tire is seated and holding air, proper maintenance keeps the system working reliably. Check your sealant levels every 2 to 4 weeks. Sealant dries out over time and loses its ability to fill small punctures.
Inspect your rim tape regularly. Even high-quality tape can loosen or wear out after months of use. Replace it whenever you notice any signs of air leaking through the spoke holes.
Keep your valve stems clean and tight. A loose valve stem is one of the most common causes of slow leaks in tubeless setups. A simple quarter-turn check before each ride or drive can save you from a flat tire at the worst possible moment.
Store your tires in a cool, dry place when not in use. Extreme heat and UV exposure can degrade the rubber and weaken the bead seal over time. This is especially important for tires that sit on vehicles for extended periods.
Final Thoughts on Seating a Tubeless Tire Without Compressor
Seating a tubeless tire without compressor is a skill that every tire owner should have in their toolkit. Whether you use a floor pump, CO2 cartridge, ratchet strap, or even the bucket method, each technique gets the job done when you know what you are doing.
The key is preparation. Clean rims, proper tape, good lubrication, and the right method all work together to create a reliable seal. Once you have seated your first tubeless tire without a compressor, you will feel confident doing it again and again.
Remember that practice makes perfect. Your first attempt might not go smoothly, and that is okay. Each try teaches you something new about your specific tire and rim combination. Before long, seating a tubeless tire will become second nature.
Keep the tips from this guide in mind next time you need to mount a tubeless tire and do not have a compressor handy. You will be back on the trail, the road, or the job site in no time.
Frequently Asked Questions
Can I use a regular bike pump to seat a tubeless tire?
Yes, but you need a pump with a high-pressure rating and a tubeless-specific head. Standard bike pumps often do not build enough pressure quickly enough to pop the bead into place. Look for a floor pump designed for tubeless setups, as it will deliver the volume and pressure you need for successful seating.
How do I know if the tire bead is fully seated?
Spin the tire and look for a gap between the bead and the rim all the way around. If the bead sits evenly and there is no visible gap, it is seated. You can also spray soapy water on the bead area. If no bubbles appear when you add air, the seal is complete and the tire is properly seated.
What should I do if the tire keeps leaking after seating?
Check your rim tape first. Make sure it is centered and covers all spoke holes. Next, inspect the valve stem for a tight seal. You can also add more sealant through the valve stem. Sometimes the bead just needs a bit more air pressure to fully seat, so try inflating again with a burst of air.
Is it safe to use the ratchet strap method on car tires?
The ratchet strap method works best on motorcycle and ATV tires. For car tires, the bead is much tighter and requires more force. Using a floor pump with a tubeless head or CO2 cartridges is safer and more effective for car-sized tubeless tires. Always work on a flat, stable surface and wear safety glasses.
How much sealant do I need for a tubeless tire?
For most bicycle tires, 2 to 4 ounces of sealant is sufficient. Larger motorcycle or ATV tires may need 6 to 8 ounces. Car tires can require even more depending on the tire size. Check your tire manufacturer’s recommendations for the exact amount. Too much sealant can create a mess and make future tire changes difficult.
Can I reuse rim tape after removing a tubeless tire?
It is best to replace the rim tape every time you remove a tire. Reused tape may have small tears, stretched areas, or weakened adhesive that can cause air leaks. Fresh rim tape ensures a clean, airtight seal over the spoke holes and gives you peace of mind that your setup is reliable.
Frequently Asked Questions
What is how to seat tubeless tire without compressor?
how to seat tubeless tire without compressor is an important topic with many practical applications.