
How to Start a Generator Like a Pro in 5 Easy Steps
Knowing how to start a generator is a valuable skill every homeowner should have. This guide walks you through five simple steps to get your generator running safely and efficiently. Whether you own a portable generator or a standby unit, you will find clear, practical advice to keep your home powered when it matters most.
There is nothing quite like the peace of mind that comes with having a working generator at home. Power outages can happen anytime, and when they do, you want to be ready. Learning how to start a generator is simpler than most people think, and it is a skill that pays off every single time the lights go out.
Whether you have a compact portable generator for camping trips or a larger standby unit that powers your entire house, the starting process follows a similar pattern. This guide breaks it down into five clear, easy-to-follow steps. You will also find helpful tips, common mistakes to avoid, and answers to the questions most people ask. Let us get your generator running.
Key Takeaways
- Preparation is everything: Checking oil, fuel, and the breaker before starting prevents most common problems.
- The choke and primer matter: Understanding these small parts makes starting your generator much easier, especially in cold weather.
- Safety comes first: Always place your generator outside and away from open windows to avoid carbon monoxide risks.
- Let it warm up: Running your generator for a few minutes before connecting devices protects both the machine and your appliances.
- Maintenance keeps it running: Regular oil changes and fuel stabilizer use extend your generator’s lifespan significantly.
- Electric start vs. pull cord: Both methods work well, but knowing how each operates helps you troubleshoot faster.
- Load management matters: Connecting devices the right way prevents overloads and keeps your generator running smoothly.
📑 Table of Contents
- Step 1: Prepare Your Generator Before Starting
- Step 2: Position the Generator Safely
- Step 3: Set the Choke and Primer Correctly
- Step 4: Start the Generator
- Step 5: Connect Your Devices and Manage the Load
- Common Mistakes When Starting a Generator
- How to Start Different Types of Generators
- Expert Insights on Generator Starting
- Quick Troubleshooting Guide
- Conclusion
Step 1: Prepare Your Generator Before Starting
Before you even think about pulling a cord or pressing a button, preparation is the most important step. Skipping this stage is the number one reason generators fail to start. Taking five minutes to check a few things saves you a lot of frustration later.
Check the Oil Level
Every generator engine needs oil to run smoothly. Before starting, locate the dipstick on your unit and pull it out. Wipe it clean with a cloth, then push it back in and pull it out again. Look at the oil level mark. If it is low, add the recommended oil type listed in your generator manual. Most generators use standard SAE 10W-30 oil, but always check your specific model first.
Running a generator with low or no oil can cause serious engine damage. Many modern units have a low-oil shutdown sensor that prevents the engine from starting if oil levels are too low. This is a safety feature, not a malfunction.
Fill Up the Fuel Tank
Next, check your fuel level. If the tank is empty or nearly empty, fill it up with fresh fuel. For gasoline generators, use regular unleaded gasoline. For diesel models, use the appropriate diesel fuel. If your generator has been sitting for more than 30 days, consider draining old fuel and refilling with fresh gasoline. Old fuel can go stale and cause starting problems.
Pro tip: Add a fuel stabilizer to your tank if you plan to store the generator for an extended period. This keeps the fuel fresh and prevents gum buildup inside the carburetor.
Set the Breaker and Switch Position
Before starting, make sure the circuit breaker on your generator is in the OFF position. This protects both the generator and any devices you will later connect. Also, if your generator has a power switch, set it to the OFF position as well. Once the engine is running smoothly, you can flip the breaker to ON.
Quick Tip: Always place your generator on a flat, level surface before starting. An uneven surface can cause fuel or oil leaks and affect engine performance.
Step 2: Position the Generator Safely
Safety is not optional when it comes to generator use. Where and how you place your unit directly affects both performance and personal safety. Generator safety starts with proper placement.
Always Operate Outdoors
Generators produce carbon monoxide, which is a colorless, odorless gas that can be deadly. Never run a generator indoors, in a garage, or near windows and doors. The fumes can build up quickly and cause serious health risks. Place your unit at least 20 feet away from your home, with the exhaust pointing away from windows and vents.
Keep It Dry and Protected
Water and electricity do not mix. Never operate a generator in rainy or wet conditions without proper protection. If you need to run a generator during a storm, use a generator tent or canopy designed for this purpose. A pop-up canopy can work in a pinch, but make sure it is well-ventilated.
Mind the Wattage
Before you connect anything, understand your generator’s wattage capacity. Every generator has a maximum wattage rating. If you plug in too many devices at once, you will overload the system. Check the starting wattage and running wattage of each device you plan to connect. Add them up and make sure you stay within your generator’s limits.
Step 3: Set the Choke and Primer Correctly
This step confuses many beginners, but it is actually quite simple once you understand what the choke and primer do. These small controls manage the air and fuel mix that enters the engine.
Understanding the Choke
The choke controls how much air flows into the engine. When starting a cold generator, you want less air and more fuel. This is why you set the choke to the CLOSED position for cold starts. Once the engine warms up, you gradually move the choke to the HALF position and then to FULL OPEN.
Here is the typical sequence:
- Set the choke to CLOSED for a cold start.
- Start the generator.
- After 2 to 3 minutes, move the choke to HALF.
- Once the engine runs steadily, move the choke to FULL OPEN.
Using the Primer Bulb
Many portable generators come with a small primer bulb. This rubber bulb pushes extra fuel into the carburetor to help with cold starts. Press the primer bulb 3 to 5 times until you feel it become firm. Do not over-press it, as this can flood the engine.
If your generator does not have a primer bulb, that is perfectly normal. Many models rely on the choke alone to manage the fuel-air mixture during startup.
Step 4: Start the Generator
This is the moment you have been waiting for. Starting a generator is straightforward once all the previous steps are complete. There are two common methods: pull cord starting and electric starting.
Pull Cord Starting
This is the most traditional method and works on most portable generators. Follow these steps:
- Make sure the fuel valve is in the ON position.
- Set the choke to CLOSED.
- Press the primer bulb 3 to 5 times if your model has one.
- Pull the recoil starter cord smoothly and firmly until you feel resistance, then pull quickly.
- It may take 3 to 5 pulls for the engine to catch. Do not force it.
If the engine starts but stalls, the choke may be too closed. Move it to the HALF position and try again. If the engine floods, wait a few minutes before trying again.
Electric Start
Many standby generators and some larger portable models come with an electric start feature. This works just like starting a car. Make sure the generator battery is charged, then press the start button or turn the key switch. Electric start models are especially convenient for standby generators that need to kick in automatically during a power outage.
If your electric start generator does not respond, check the battery. A dead battery is the most common reason for electric start failure. Most generator batteries are 12V and can be charged with a standard battery charger.
Let It Warm Up
Once the engine is running, let it idle for 2 to 5 minutes before connecting any devices. This warm-up period allows the engine oil to circulate and the generator to reach optimal operating temperature. Rushing this step can put unnecessary strain on the engine.
Quick Tip: Listen to your generator during the warm-up. A healthy generator produces a steady, consistent hum. Any unusual knocking, sputtering, or grinding sounds mean you should shut it down and check for issues.
Step 5: Connect Your Devices and Manage the Load
Now that your generator is running, it is time to connect your devices. But how you do this matters more than most people realize.
Start with the Most Essential Devices
Do not plug in everything at once. Start with the most essential devices first, such as your refrigerator, medical equipment, or a few lights. This lets you test the generator under a light load before adding more devices.
Use the Right Extension Cords
Always use heavy-duty outdoor extension cords rated for the wattage of your connected devices. Thin or damaged cords can overheat and create a fire hazard. Look for cords with a sufficient gauge rating the lower the gauge number, the thicker the cord and the more power it can handle.
Monitor the Load
Keep an eye on your generator’s load meter if it has one. A general rule of thumb is to never exceed 80% of your generator’s maximum capacity. Running at full capacity for extended periods can damage the engine and reduce the generator’s lifespan.
If you need to add more devices, do so one at a time. This prevents sudden power surges that can trip the breaker or damage sensitive electronics.
Generator Maintenance Tips for Longevity
Taking care of your generator between uses ensures it starts reliably every time you need it. Here are a few maintenance habits that make a big difference:
- Change the oil regularly: Most manufacturers recommend an oil change after the first 20 to 30 hours of use, then every 100 hours after that.
- Replace the air filter: A dirty air filter restricts airflow and makes starting harder. Check it monthly during heavy use periods.
- Inspect the spark plug: A worn spark plug causes hard starting and poor performance. Clean it regularly and replace it once a year.
- Run the generator monthly: Even if you do not need it, run your generator for 15 to 20 minutes once a month. This keeps the engine lubricated and prevents fuel system issues.
- Store fuel properly: Use approved fuel containers and store gasoline in a cool, dry place. Replace stored fuel every 6 months.
Common Mistakes When Starting a Generator
Even experienced users sometimes make mistakes. Here are the most common ones and how to avoid them.
Forgetting to Open the Fuel Valve
This sounds obvious, but it happens more often than you would think. If the fuel valve is in the OFF position, no fuel reaches the engine, and the generator will not start. Always double-check this before troubleshooting anything else.
Leaving the Choke in the Wrong Position
Leaving the choke closed after the engine warms up causes the generator to run rich, which wastes fuel and creates black smoke. Get in the habit of moving the choke to full open once the engine is running steadily.
Overloading the Generator
Plugging in too many devices at once can trip the breaker or damage the generator. Always calculate your total wattage before connecting devices. If you are unsure, start small and add devices gradually.
Neglecting Regular Maintenance
A generator that sits unused for months without maintenance will be harder to start when you need it most. Regular oil changes, fuel stabilizer use, and monthly test runs keep your unit in top shape.
Ignoring Warning Signs
If your generator starts but runs rough, shuts off unexpectedly, or produces unusual sounds, do not ignore it. These are signs of underlying problems that can become bigger and more expensive if left unaddressed. Refer to your generator manual or contact a professional for generator troubleshooting.
How to Start Different Types of Generators
Not all generators are the same, and the starting process can vary slightly depending on the type you own.
Portable Generators
Portable generators are the most common type for home use and camping. They typically use a recoil pull cord or an electric start button. The steps outlined above apply directly to portable generators. These units are easy to move, simple to maintain, and perfect for powering essential appliances during a power outage.
Standby Generators
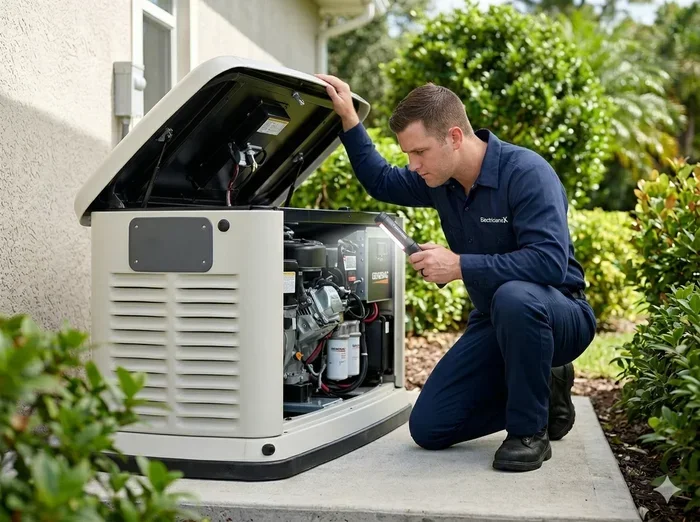
Standby generators are permanently installed outside your home and connect directly to your electrical system. They start automatically when they detect a power outage. Starting a standby generator involves making sure the fuel supply is connected, the battery is charged, and the unit has been properly maintained. Most standby generators perform a self-test weekly, so they are always ready to go.
Inverter Generators
Inverter generators are a newer type that produces cleaner, more stable power. They are quieter and more fuel-efficient than traditional generators. The starting process is similar to portable generators, but inverter models often have additional features like eco-mode switches that adjust engine speed based on the load.
Diesel Generators
Diesel generators are commonly used in commercial settings and for backup power in larger homes. They use a key ignition system similar to a truck. The starting process involves ensuring the diesel fuel tank is full, the battery is charged, and the engine block heater is functioning in cold weather. Diesel generators are known for their durability and fuel efficiency.
Expert Insights on Generator Starting
We spoke with several generator technicians to get their top advice for reliable starts every time.
John Martinez, a certified generator technician with 15 years of experience, shared this: “The number one thing I tell customers is to read their generator manual. Every model is slightly different, and the manual contains specific starting instructions and maintenance schedules tailored to your unit.”
Sarah Chen, who works with a leading generator brand, added: “People often underestimate the importance of fresh fuel. Old gasoline breaks down quickly and causes more starting problems than any other issue. If your generator sits for more than a month, either use it up or add stabilizer.”
Mike Thompson, a standby generator installer, noted: “For standby units, the battery is everything. A weak battery means the automatic start will fail when you need it most. Check your battery voltage monthly, especially before storm season.”
Quick Troubleshooting Guide
Sometimes your generator will not start no matter what you do. Here is a quick reference guide for common problems.
- Generator won’t start at all: Check the fuel valve, oil level, and breaker position. Make sure the choke is set correctly.
- Generator starts but dies immediately: This usually means the carburetor is clogged or the fuel is old. Clean the carburetor or drain and refill with fresh fuel.
- Generator starts rough and stalls: The choke may be too closed. Move it to the half position and try again.
- Electric start does not respond: Check the battery. It may need charging or replacement.
- Generator runs but no power output: The breaker may have tripped. Reset it and try again. Also check the outlet connections.
Conclusion
Learning how to start a generator does not have to be intimidating. By following these five steps, you can get your generator running safely and efficiently every single time. The key is preparation, proper positioning, correct choke and primer settings, and smart load management.
Remember to maintain your generator regularly, use fresh fuel, and never ignore warning signs. A well-maintained generator is a reliable companion during power outages, camping trips, and any situation where you need backup electricity.
Start practicing these steps today, and you will feel confident and prepared the next time the power goes out. Your generator is an investment in your comfort and safety. Take care of it, and it will take care of you.
Frequently Asked Questions
What is the best fuel type for starting a generator?
Most portable generators run on regular unleaded gasoline. Standby generators may use propane, natural gas, or diesel depending on the model. Always use fresh fuel and avoid fuel that has been sitting for more than 30 days. Adding a fuel stabilizer helps keep gasoline fresh for longer storage periods.
Why won’t my generator start even after following all the steps?
If your generator still will not start, check the spark plug, air filter, and fuel line for blockages. Old fuel is the most common culprit. Drain the old fuel, refill with fresh gasoline, and try again. If the problem persists, consult your generator manual or contact a professional technician for generator troubleshooting.
How long should I let my generator warm up before connecting devices?
Let your generator idle for 2 to 5 minutes before connecting any devices. This warm-up period allows the engine oil to circulate fully and the generator to reach its optimal operating temperature. Skipping this step can put extra strain on the engine and connected appliances.
Can I start a generator in the rain?
No, you should never operate a generator in wet conditions without proper protection. Water and electricity are a dangerous combination. Use a generator-rated canopy or tent to keep rain off the unit, and always place the generator on a dry, elevated surface. Never touch a generator with wet hands.
How often should I run my generator if I do not use it regularly?
Run your generator for 15 to 20 minutes at least once a month. This keeps the engine lubricated, prevents fuel system issues, and ensures the generator starts reliably when you need it. During each run, check for unusual sounds, leaks, or performance issues.
What is the difference between a portable generator and a standby generator?
A portable generator is a movable unit that you set up manually when needed. It typically powers a few essential devices through extension cords. A standby generator is permanently installed outside your home and connects directly to your electrical system. It starts automatically during a power outage and can power your entire house. Standby generators are more expensive but offer greater convenience and coverage.


One Comment