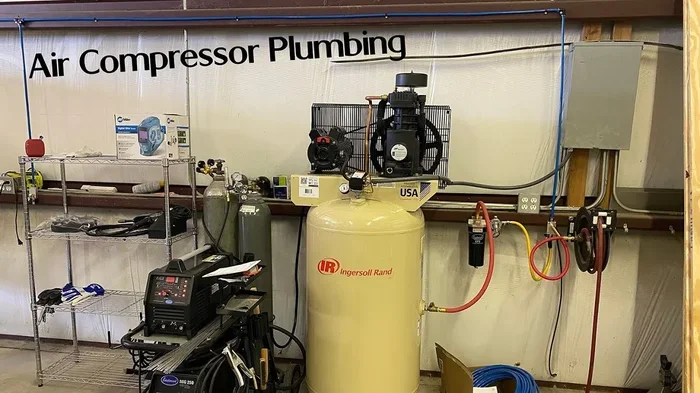
how to plumb an air compressor for peak performance
Plumbing your air compressor correctly boosts performance and extends tool life. This guide covers everything from choosing fittings to testing your setup. You will learn how to install compressor lines, select the right piping materials, and avoid common mistakes that cause leaks and pressure drops.
Plumbing an air compressor might sound like a job for a professional. But honestly, it is one of the most rewarding DIY projects you can tackle. When you get it right, your compressor delivers steady air pressure, your tools run smoother, and you avoid costly repairs down the road.
Whether you are setting up a new compressor in your garage or upgrading an old system, how to plumb an air compressor is a skill that pays off fast. In this guide, we walk you through every step. You will learn about piping materials, fitting types, testing methods, and maintenance tips that keep your system running at peak performance.
We keep things simple and practical here. No fluff, no confusing jargon. Just clear instructions that anyone can follow. Let us get started.
Key Takeaways
- Proper planning prevents leaks: Measuring and planning your plumbing layout before buying fittings saves time and money.
- Material choice matters: Copper, PEX, and stainless steel each have unique benefits for compressor plumbing.
- Fittings must match your system: Using the wrong size or type of fitting causes pressure drops and air leaks.
- Testing is non-negotiable: Always pressure-test your plumbing before running tools to catch leaks early.
- Maintenance keeps it running: Regular inspection and cleaning of your plumbing setup prevents buildup and failures.
- Safety comes first: Proper grounding, pressure relief, and shutoff valves protect both you and your equipment.
📑 Table of Contents
Understanding Air Compressor Plumbing Basics
Before you buy a single fitting or piece of pipe, you need to understand what compressor plumbing actually involves. At its core, plumbing an air compressor means connecting the tank to your tools through a series of pipes, valves, and fittings. The goal is to deliver clean, consistent air pressure without leaks or drops.
Think of it like the plumbing in your house. Water flows from the main line through pipes to every faucet. Air works the same way. It flows from the compressor tank through lines to every tool you use.
Key Components of a Compressor Plumbing System
Every air compressor plumbing setup has a few essential parts. Knowing what they do helps you plan and install correctly.
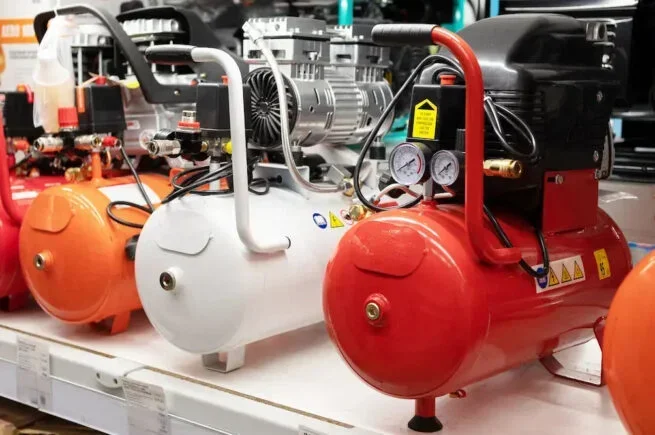
- Compressor Tank: This is where air gets stored under pressure. It is the heart of your system.
- Pressure Switch: This turns the compressor on and off based on the air pressure in the tank.
- Regulator: This controls the output pressure going to your tools. It ensures consistent airflow.
- Air Lines: These are the pipes or hoses that carry air from the tank to your tools.
- Fittings and Connectors: These join pipes together and connect them to tools and valves.
- Moisture Trap/Filter: This removes water and debris from the air before it reaches your tools.
Understanding these parts makes the whole process much easier. You will also hear people talk about compressor air lines and plumbing connections. These are just the pipes and joints that make up your system.
Why Proper Plumbing Matters
Bad plumbing causes real problems. Leaks waste energy and reduce pressure. Wrong pipe materials can corrode or crack. Poor routing creates pressure drops that make your tools underperform.
When you invest time in getting the plumbing right, you get better tool performance, lower energy costs, and fewer breakdowns. It really is that simple.
Tools and Materials You Will Need
Gathering everything before you start is the smartest thing you can do. Nothing slows down a project faster than searching for a wrench in the middle of a job.
Essential Tools
- Pipe cutter or hacksaw
- Adjustable wrenches
- Teflon tape or pipe sealant
- Pressure gauge
- Drill with appropriate bits
- Level and measuring tape
- Deburring tool or file
- Safety glasses and gloves
Materials for Plumbing
Your material list depends on your setup and preferences. Here are the most common options:
- Copper piping: Durable and corrosion-resistant. Great for permanent installations.
- PEX tubing: Flexible and easy to install. Ideal for tight spaces.
- Stainless steel lines: Strong and long-lasting. Best for high-pressure systems.
- Polyethylene tubing: Affordable and lightweight. Good for light-duty setups.
- Fittings: Couplings, elbows, tees, and adapters in the right sizes.
- Regulator and moisture trap: Essential for protecting your tools.
Before you start, also check that your workshop power supply is adequate. If you rely on a backup generator for your shop, make sure it can handle the compressor motor starting load. This prevents tripped breakers and frustrating shutdowns mid-job.
Step-by-Step Plumbing Process
Now comes the fun part. Here is the actual process for plumbing an air compressor from start to finish. Follow these steps in order and you will have a clean, efficient setup.
Step 1: Plan Your Layout
Start by sketching where your compressor, tank, and tools are located. Measure the distances between them. Mark where pipes will run and where fittings are needed.
Keep these tips in mind:
- Keep lines as short as possible to reduce pressure loss.
- Avoid sharp bends that restrict airflow.
- Place the regulator close to your most-used tools.
- Leave room for maintenance access.
A good plan saves time and materials. It also helps you estimate costs before you buy anything.
Step 2: Install the Main Line
The main line runs from the compressor outlet to your workshop. This is the backbone of your system. Cut your pipe to length using a pipe cutter for clean edges. Deburr the inside and outside of each cut end.
For permanent setups, copper pipe works well. For flexibility, PEX tubing is easier to handle. Secure the main line to walls or ceilings using pipe clamps every four to six feet.
Step 3: Add the Pressure Regulator
Install the regulator on the main line before it branches off to individual tools. The regulator lets you set the exact pressure each tool needs. Most tools work best between 90 and 120 PSI, but always check the manufacturer’s rating.
Use Teflon tape on all threaded connections to prevent leaks. Wrap it clockwise around the threads for a tight seal.
Step 4: Branch Out to Individual Tools
Use tee fittings to split the main line into branches for different tools. Each branch should have its own shutoff valve. This lets you isolate tools without draining the whole system.
Keep branch lines as short and straight as possible. Every extra elbow or extension adds resistance and reduces airflow.
Step 5: Install a Moisture Trap
Compressed air carries moisture that can damage tools over time. Install a moisture trap or filter regulator combo at the end of each branch line. This removes water and keeps your tools running clean.
Some people skip this step and regret it later. Rust and corrosion from moisture is the number one killer of pneumatic tools.
Step 6: Test the System
Before you run any tools, test the entire system. Turn on the compressor and let it build pressure. Check every connection with soapy water. Bubbles mean a leak. Tighten or reseal any problem spots.
Also check the pressure gauge at the regulator output. It should match your setting within a few PSI. If pressure drops significantly, you likely have a leak or a restriction in your lines.
It is also worth noting that if your compressor shares a circuit with other heavy equipment, your home’s electrical setup matters. A reliable power source ensures your compressor gets the steady voltage it needs to maintain consistent pressure.
Choosing the Right Fittings and Piping
Not all fittings and piping are created equal. Choosing the right materials for your setup makes a huge difference in performance and longevity.
Copper vs. PEX vs. Stainless Steel
Here is a quick comparison of the three most popular options:
- Copper: Best for permanent indoor setups. Resists corrosion and handles high pressure. Requires soldering skills and tools.
- PEX: Flexible and easy to install with push-fit fittings. Great for garages and workshops. Not ideal for outdoor or UV exposure.
- Stainless Steel: The strongest option. Handles the highest pressures and resists corrosion. More expensive and harder to work with.
Sizing Your Pipes Correctly
Pipe size affects airflow directly. Too small and you lose pressure. Too large and you waste money and space.
As a general rule:
- Use 1/4-inch line for tools under 5 CFM.
- Use 3/8-inch line for tools between 5 and 15 CFM.
- Use 1/2-inch line for tools over 15 CFM.
Check your compressor’s output rating and your most demanding tool’s CFM requirement. Size your main line to handle the highest demand tool in your shop.
Quick Tips for Fitting Selection
- Always match thread types (NPT, BSP, or push-fit) to avoid compatibility issues.
- Use brass fittings for corrosion resistance in humid environments.
- Buy a few extra fittings. You will need them, and running to the store mid-install is annoying.
- Do not overtighten fittings. This cracks threads and causes leaks.
Common Mistakes to Avoid
Even experienced DIYers make mistakes with compressor plumbing. Here are the most common ones and how to avoid them.
Using the Wrong Pipe Size
This is the number one mistake people make. Undersized pipes cause pressure drops that make your tools run weak. Always size up if you are unsure.
Skipping the Moisture Trap
Moisture in compressed air causes rust in tools and fittings. It also ruins paint jobs if you use an air gun. A simple moisture trap saves hundreds in tool replacement costs.
Over-Tightening Fittings
It seems counterintuitive, but tighter is not always better. Over-tightening cracks fittings and strips threads. Hand-tighten first, then give it a quarter turn with a wrench.
Ignoring Pressure Relief
Every compressor system needs a pressure relief valve. This prevents dangerous pressure buildup that could rupture lines or the tank itself. Never bypass or remove this safety feature.
Poor Routing and Support
Loose pipes vibrate and connections loosen over time. Support your lines properly with clamps and avoid routing them near heat sources or sharp edges.
Not Planning for Future Expansion
If you think you might add more tools later, install extra tee fittings now. It is much easier to add a branch line during initial plumbing than to cut into finished lines later.
Expert Insight
Many professional shops run their compressor plumbing on a closed-loop system where air circulates back to the tank. This reduces pressure fluctuations and keeps airflow consistent across all workstations. If you run a busy shop with multiple users, consider this layout for your next build.
Maintenance Tips for Long-Lasting Performance
Your plumbing setup should last for years with proper care. A few simple habits make a big difference.
Regular Inspection
Check all fittings and connections monthly. Look for signs of corrosion, cracks, or loose joints. Tighten anything that has loosened over time.
Drain the Tank Regularly
Moisture collects in the tank every time you run the compressor. Drain it after each use or at least once a week. This prevents rust inside the tank and keeps your air clean.
Replace Filters and Moisture Traps
Filters clog over time and reduce airflow. Check them monthly and replace when you notice reduced performance. A clogged filter also puts extra strain on the compressor motor.
Keep Lines Clean
Debris can build up inside pipes over time. Periodically flush your lines with compressed air to clear out any accumulated dust or moisture.
Lubricate Moving Parts
While this is not strictly plumbing, keeping your compressor’s internal parts lubricated extends the life of the entire system, including the lines and fittings connected to it.
Monitor Pressure Levels
If you notice your pressure dropping more than usual, check for leaks in your plumbing. A small leak can waste a surprising amount of energy and reduce tool performance.
Also, remember that your compressor needs a stable power supply to maintain consistent compressor pressure. If you use a backup generator, check its output regularly to ensure it delivers steady power without voltage fluctuations that stress your system.
Conclusion
Learning how to plumb an air compressor is one of the best investments you can make for your workshop. A well-plumbed system delivers better performance, lasts longer, and saves you money on energy and tool replacement.
Start with a solid plan. Choose the right materials for your needs. Follow each step carefully. Test thoroughly before using your tools. And maintain your system regularly to keep it running smoothly for years.
You do not need to be a professional plumber or mechanic to get this right. With the right knowledge and a little patience, anyone can build a compressor plumbing setup that delivers peak performance. Now go build yours and enjoy the difference it makes in every project.
Frequently Asked Questions
What is the best pipe material for air compressor plumbing?
Copper is the most popular choice for indoor setups because it is durable and resists corrosion. PEX is a great option if you want easy installation and flexibility. Stainless steel works best for high-pressure systems that need maximum strength.
How do I know what size pipe to use for my compressor?
Check the CFM rating of your most demanding tool and size your main line accordingly. Use 1/4-inch pipe for tools under 5 CFM, 3/8-inch for 5 to 15 CFM, and 1/2-inch for anything above 15 CFM. When in doubt, go one size up.
Can I use garden hoses for air compressor lines?
You can for light-duty tasks, but garden hoses are not designed for continuous compressed air use. They can burst under pressure and do not provide a consistent airflow. Use proper compressor-rated hoses and piping for best results.
How do I find leaks in my compressor plumbing?
The soapy water test is the easiest method. Mix dish soap with water and spray it on all connections while the system is pressurized. Bubbles will form at any leak points. You can also use an electronic leak detector for more precise results.
Do I need a moisture trap if my compressor has an internal tank?
Yes. Even with an internal tank, moisture passes through to your air lines and tools. A moisture trap at the point of use catches this water before it damages your tools or affects your work. It is a small investment that prevents big problems.
How often should I inspect my compressor plumbing?
Inspect all connections and fittings at least once a month. Check for leaks, corrosion, and loose joints. Replace any damaged components immediately to prevent pressure loss and potential safety hazards.