How to Adjust PSI on Your Air Compressor Like a Pro
Adjusting the PSI on your air compressor is simple once you understand the regulator and pressure gauge. This guide walks you through every step, from locating the adjustment knob to setting the right PSI for your tools. You will also learn common mistakes to avoid and pro tips that save time and money.
Adjusting the PSI on your air compressor might sound intimidating, but it is actually one of the easiest skills you can learn. Whether you are a weekend DIYer or a professional mechanic, knowing how to set the right pressure makes every job smoother. The process involves a few simple steps, and once you get the hang of it, you will never second-guess yourself again.
In this guide, we will walk you through everything you need to know. You will learn what PSI means, how to find the regulator on your machine, and exactly how to turn the knob for the perfect setting. We also cover common mistakes, tool-specific pressure settings, and expert tips that make a real difference. Let us get started.
Key Takeaways
- Know Your PSI: Every tool has a recommended PSI range. Setting the right pressure keeps your tools running smoothly and safely.
- Use the Regulator: The pressure regulator valve is the key component that lets you fine-tune output pressure.
- Check the Gauge: Always monitor both the tank gauge and the regulator gauge to avoid over-pressurizing.
- Avoid Common Mistakes: Never exceed your tool’s max PSI, and always release tank pressure before making adjustments.
- Maintenance Matters: Regularly inspect your regulator and gauge for wear to keep readings accurate.
- Power Matters Too: If you run tools off a generator, make sure your power source can handle the load. Check out how many watt generator do I need for guidance.
📑 Table of Contents
- Understanding PSI and How Pressure Regulation Works
- Step-by-Step Guide to Adjusting PSI on Your Air Compressor
- Common PSI Settings for Different Air Tools
- Quick Tips for Perfect PSI Every Time
- Common Mistakes People Make When Adjusting PSI
- Expert Insights on Managing Compressor Pressure
- Key Takeaways
- Frequently Asked Questions
- Conclusion
Understanding PSI and How Pressure Regulation Works
What Is PSI on an Air Compressor?
PSI stands for pounds per square inch. It measures the force of compressed air coming out of your machine. Think of it like water pressure from a garden hose. Too little pressure, and your tool will not work properly. Too much pressure, and you risk damaging your equipment or creating a safety hazard.
Every pneumatic tool has a recommended PSI range printed on its body or in the manual. For example, a nail gun might need 70 to 120 PSI, while an impact wrench could need 90 to 150 PSI. Knowing your tool’s PSI requirement is the first step to setting your compressor correctly.
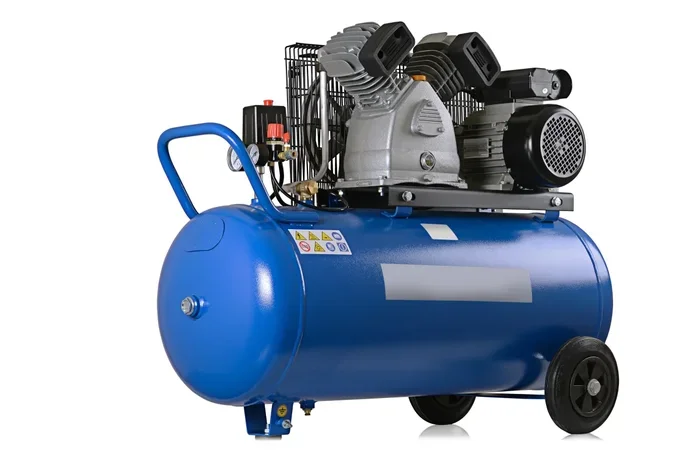
Your compressor has two gauges. The tank gauge shows how much pressure is stored inside the tank. The regulator gauge shows the output pressure you are sending to your tool. Understanding the difference between these two readings is essential for safe and effective operation.
How the Pressure Regulator Valve Controls Output
The pressure regulator valve is the device that lets you adjust the output PSI. It sits between the tank and your air hose. When you turn the regulator knob, you are telling the valve how much compressed air to release. More open means higher PSI. More closed means lower PSI.
Here is a simple way to think about it. Imagine a water faucet. When you turn it up, more water flows. When you turn it down, less water flows. The regulator works the same way, but with compressed air instead of water. The regulator does not change how much pressure the pump builds. It only controls how much of that pressure reaches your tool.
Some compressors have a simple knob that you turn clockwise or counterclockwise. Others have a lever or a dial. The principle is the same no matter the style. You turn it to increase or decrease the output pressure.
Step-by-Step Guide to Adjusting PSI on Your Air Compressor
Step 1: Turn Off the Compressor and Release Tank Pressure
Before you touch the regulator, make sure the machine is off. Let the tank fill completely, then unplug the unit or turn off the motor. Next, pull the unloader valve to release any remaining pressure in the lines. This is a critical safety step. Never adjust the regulator while the compressor is running or while there is still pressure in the system.
Releasing the pressure ensures that when you turn the knob, you are starting from a known baseline. It also protects you from accidental air bursts that can cause injury.
Step 2: Plug In and Power On the Compressor
Once the tank is empty, plug the compressor back in or turn the switch on. Let the motor run until the pump kicks in and fills the tank to its cut-off pressure. Most home compressors shut off somewhere between 120 and 150 PSI. Watch the tank gauge and wait for the motor to stop.
If your compressor has a pressure switch, it controls when the pump turns on and off. The switch is set at the factory, and you generally do not need to adjust it. Just let the tank fill to its maximum pressure before moving on.
Step 3: Connect Your Air Tool and Hose
Attach your air hose to the compressor outlet. Then connect your pneumatic tool to the other end of the hose. Make sure all fittings are tight. A loose connection can cause air leaks, which throw off your pressure readings and reduce tool performance.
If you do not have a regulator on your hose, the pressure from the tank flows directly to the tool. This is why having a regulator on the compressor or hose is so important. It gives you control over the output pressure.
Step 4: Turn the Regulator Knob to Set Your Desired PSI
Now comes the actual adjustment. Look at the regulator gauge. It shows the current output pressure. To increase PSI, turn the knob clockwise. To decrease PSI, turn it counterclockwise. Make small adjustments. Watch the gauge closely as you turn.
Set the PSI to match the lowest pressure your tool needs. For example, if your tool requires 90 to 120 PSI, set the regulator to 90 PSI. This gives you a safe starting point. You can always increase it slightly if the tool is not performing well.
Step 5: Test and Fine-Tune the Setting
With the regulator set, turn on your tool and let it run for a few seconds. Watch the regulator gauge. If the pressure drops significantly when you use the tool, your compressor may not be keeping up. This could mean your tank is too small, or the pump is not generating enough CFM.
If the pressure holds steady and the tool works as expected, you are all set. If not, turn the knob slightly and test again. Keep adjusting in small increments until you find the sweet spot. The goal is a steady, consistent pressure that matches your tool’s needs.
Common PSI Settings for Different Air Tools
Different tools need different pressures. Setting the wrong PSI can lead to poor performance, wasted air, or even tool damage. Below is a quick reference table showing common tools and their recommended PSI ranges.
| Air Tool | Recommended PSI Range | Typical Use |
|---|---|---|
| Brad Nailer | 60 – 100 PSI | Trim work, cabinetry |
| Framing Nailer | 70 – 120 PSI | Framing, decking |
| Impact Wrench | 90 – 150 PSI | Tire changes, heavy bolts |
| Paint Spray Gun | 15 – 50 PSI | Auto painting, furniture |
| Sandblaster | 40 – 100 PSI | Surface prep, rust removal |
| Drill / Driver | 70 – 90 PSI | General drilling and fastening |
| Air Ratchet | 30 – 80 PSI | Tight spaces, light tightening |
| Tire Inflator | 30 – 50 PSI | Car and bike tires |
Always check your tool’s manual for the exact PSI recommendation. The numbers above are general guidelines. Some specialty tools may need higher or lower pressures. When in doubt, start low and increase gradually.
Quick Tips for Perfect PSI Every Time
- Start Low, Go Slow: Always begin at a lower PSI and increase gradually. This prevents sudden pressure spikes that can damage your tools.
- Watch Both Gauges: Keep an eye on the tank gauge and the regulator gauge. They tell you different things, and both matter.
- Check for Leaks: If your pressure keeps dropping, inspect all connections and fittings. Even a small leak wastes compressed air and throws off your settings.
- Match PSI to the Task: Delicate jobs like painting need low PSI. Heavy-duty jobs like impact wrenching need high PSI. Adjust accordingly.
- Use a Regulator on Every Hose: If you run multiple hoses to different workstations, put a regulator on each one. This lets you set the right pressure for each tool independently.
- Consider Portable Power: If you use your compressor on jobsites without electrical outlets, you may need a portable power source. Learn how many watt generator do I need to make sure your setup has enough power.
Common Mistakes People Make When Adjusting PSI
Mistake 1: Setting PSI Too High
The most common mistake is turning the regulator too high. People think more pressure means more power, but that is not true. Excessive PSI can blow out fittings, damage tool seals, and even cause the tank to fail. Always stay within your tool’s recommended range.
Mistake 2: Ignoring the Unloader Valve
Skipping the unloader valve step is dangerous. When you adjust the regulator with pressure still in the lines, the sudden release can cause injury or damage the regulator. Always release tank pressure first.
Mistake 3: Confusing Tank Pressure with Output Pressure
Remember that the tank gauge and regulator gauge measure different things. The tank holds pressure at the pump’s maximum level. The regulator controls what reaches your tool. Adjusting the tank pressure is not the same as adjusting the output PSI. Always use the regulator to control tool pressure.
Mistake 4: Neglecting Regular Maintenance
Over time, regulators can wear out. Gaskets degrade, seals crack, and gauges become inaccurate. If your pressure readings seem off even after a proper adjustment, it may be time to replace the regulator or have the gauge checked. Regular maintenance keeps your compressor running accurately and safely.
Expert Insights on Managing Compressor Pressure
Seasoned professionals know that pressure management goes beyond just turning a knob. Here are some insights from experienced shop owners and technicians.
Invest in a quality regulator. Cheap regulators are less accurate and wear out faster. A good regulator pays for itself by keeping your tools running at the right pressure and reducing wasted air. Look for regulators with clear, easy-to-read gauges and smooth adjustment knobs.
Understand your compressor’s duty cycle. Duty cycle is the percentage of time your compressor can run within a 10-minute period. If your compressor has a 50% duty cycle, it runs for 5 minutes and rests for 5 minutes. Pushing it beyond its duty cycle by running high-pressure tools continuously can overheat the motor and shorten its lifespan.
Keep your intake filters clean. Dirty filters restrict airflow, which reduces CFM and can cause pressure drops. Check and clean or replace your intake filter regularly. This simple maintenance task keeps your compressor performing at its best.
Know when to call a professional. If your compressor will not hold pressure, the regulator feels spongy, or the gauge reads erratically, these could be signs of serious internal issues. Do not try to fix a damaged tank or a faulty pressure switch yourself. Consult a qualified technician for repairs.
Also, keep in mind that air compressors and generators both deal with power conversion, but they work differently. If you are curious about how mechanical energy becomes usable power, understanding how does a generator work can give you helpful context for how your compressor’s motor operates as well.
Key Takeaways
- Know Your Tool’s PSI: Every pneumatic tool has a recommended pressure range. Always check before adjusting.
- Use the Regulator, Not the Tank: The regulator controls output PSI. The tank gauge only shows stored pressure.
- Release Pressure First: Always use the unloader valve before making any adjustments. Safety comes first.
- Adjust in Small Increments: Small turns prevent over-pressurizing and give you finer control.
- Maintain Your Equipment: Clean filters, check gauges, and replace worn regulators to keep everything accurate.
- Match PSI to the Job: Delicate tasks need low pressure. Heavy-duty tasks need high pressure. Adjust accordingly.
- Consider Your Power Source: For off-grid or jobsite use, make sure your electrical setup can handle the load. Visit how many watt generator do I need for helpful guidance on matching power to your tools.
Frequently Asked Questions
What happens if I set the PSI too high on my air compressor?
Setting the PSI too high can damage your pneumatic tools, blow out fittings, and create safety hazards. Excessive pressure wears out seals and gaskets faster. Always stay within the recommended PSI range for each tool to avoid costly repairs and potential injury.
How do I know what PSI my air tool needs?
Check the tool’s manual or look for a label on the body of the tool. Most manufacturers print the recommended PSI range directly on the tool. If you can not find it, search the model number online. The general rule is to match your regulator setting to the tool’s lowest recommended PSI and increase only if needed.
Can I adjust the PSI while the compressor is running?
You can make small adjustments while the compressor is running, but it is safer to release tank pressure first. Turning the regulator while the system is pressurized can cause sudden air bursts. For the safest approach, always power off the unit, release pressure, and then make your adjustments.
What is the difference between tank pressure and regulator pressure?
Tank pressure is the total compressed air stored inside the tank. Regulator pressure is the output pressure you send to your tool through the hose. The tank gauge shows storage level, while the regulator gauge shows what actually reaches your tool. Always adjust the regulator to control tool pressure.
Why does my pressure drop when I start using my air tool?
A slight pressure drop is normal when a tool starts using air. If the drop is significant, your compressor may not be producing enough CFM to keep up. This can happen if the tank is too small, the pump is worn, or there is a leak in the system. Check for leaks first, then consider whether your compressor is sized correctly for your tools.
How often should I check and adjust my compressor PSI?
You should check your PSI setting every time you start a new task or switch tools. For routine maintenance, inspect your regulator and gauges monthly. If you use your compressor daily, a weekly check ensures accurate readings and extends the life of both the compressor and your pneumatic tools.
Conclusion
Adjusting the PSI on your air compressor is a straightforward skill that anyone can learn. The key is understanding your regulator, reading your gauges correctly, and making small, deliberate adjustments. Once you know the right pressure for each tool, you will work faster, safer, and with better results.
Remember to always release tank pressure before adjusting, match your settings to your tool’s requirements, and maintain your equipment regularly. These simple habits keep your compressor running smoothly for years. Whether you are inflating tires, framing a house, or spraying paint, the right PSI makes all the difference.
Take a few minutes today to practice adjusting your regulator. Once you feel confident, you will wonder why you ever hesitated. Happy compressing!