What Tools Are Needed to Change Brake Pads at Home
Changing your brake pads at home is one of the most satisfying DIY jobs you can do. You need a solid set of tools including a floor jack, jack stands, lug wrench, torque wrench, C-clamp, brake caliper tool, and brake cleaner. With the right brake pad replacement tools and a little patience, you can save hundreds of dollars and keep your car safe on the road.
Changing brake pads at home might feel intimidating the first time. But honestly, it is one of the easiest and most rewarding repairs you can tackle. You do not need a fancy garage or years of experience. You just need the right tools and a little confidence.
In this guide, we will walk through every single tool you need to change brake pads at home. We will cover the basics, the specialized items, and a few things beginners often forget. By the end, you will know exactly what to grab before you start your brake pad replacement project.
Why does this matter? Well, taking your car to a mechanic for brake pad changes can cost anywhere from 150 to 300 dollars per axle. Doing it yourself cuts that cost dramatically. Plus, you learn valuable skills that make future repairs easier. Let us dive in.
Key Takeaways
- Basic hand tools are essential: You need a lug wrench, socket set, torque wrench, and C-clamp to complete the job safely.
- Safety gear comes first: Jack stands, gloves, and safety glasses protect you while you work under the vehicle.
- Specialized brake tools make the job easier: A brake caliper tool, brake pad spreader, and bleeder wrench help you handle stubborn brake components.
- Budget-friendly options exist: You do not need expensive equipment to change brake pads at home with the right approach.
- Proper tool maintenance matters: Cleaning and storing your tools after the job ensures they last for many future repairs.
- Knowing what not to skip is critical: Anti-seize compound, brake cleaner, and brake fluid are consumables you must have on hand.
📑 Table of Contents
Essential Hand Tools for Brake Pad Changes
Before you touch your car, make sure you have the basic hand tools lined up. These are the tools you will use in nearly every step of the process. Skipping any of them can slow you down or make the job unsafe.
Lug Wrench
Your lug wrench is the first tool you will reach for. It removes the lug nuts that hold your wheels in place. Most cars use a standard lug wrench that comes with the vehicle. However, a four-way lug wrench gives you more options and fits better in tight spaces. Make sure yours matches your lug nut size.
Socket Set
A good socket set is non-negotiable. You will need various sizes to remove bolts holding the brake caliper and caliper bracket. A 10mm, 12mm, 14mm, and 17mm socket covers most vehicles. A ratchet with extension bars helps you reach bolts in tight spots. Invest in a quality set that will last for years of DIY repairs.
Torque Wrench
A torque wrench is arguably the most important tool for brake pad changes. It ensures you tighten lug nuts and caliper bolts to the correct specification. Over-tightening can strip bolts or warp rotors. Under-tightening can cause wheels to come loose, which is extremely dangerous.
You can find a basic torque wrench for under 30 dollars. It is one of the best investments you can make for home car maintenance. Always check your vehicle manual for the exact torque specs before tightening anything down.
C-Clamp
A C-clamp serves a very specific but important purpose during brake pad replacement. When you compress the brake caliper piston back in, you need steady, even pressure. A standard C-clamp works perfectly for this. Just place it over the caliper and gently tighten until the piston slides back into its bore.
Some people use a G-clamp or a specialized brake piston tool instead. But a C-clamp gets the job done just as well for most situations. Make sure the clamp is wide enough to fit over your caliper body.
Specialized Brake Tools
Beyond the basic hand tools, a few specialized items will make your brake pad job much smoother. These tools handle the unique challenges of brake system components.
Brake Caliper Tool
A brake caliper tool, also called a brake pad spreader, helps you compress the caliper piston evenly. Unlike a C-clamp, which can sometimes cock and damage the piston seal, a proper brake caliper tool distributes pressure uniformly. This protects the piston and keeps your brake system sealed properly.
These tools are inexpensive and easy to use. They typically fit most popular caliper sizes. If you plan to do brake jobs regularly, this is a worthwhile addition to your toolkit.
Brake Pad Spreader
A brake pad spreader helps you remove old pads from the caliper bracket. Over time, brake pads can stick due to corrosion and built-up brake dust. A spreader gently pushes the pads free without damaging the bracket or sliding pins. This saves you from using excessive force that could bend or scratch components.
Bleeder Wrench
A bleeder wrench is a thin, closed-end wrench designed specifically for brake bleeder valves. These valves are often located in hard-to-reach spots behind the caliper or on the brake caliper bracket. A standard open-end wrench can strip these small valves, causing a real headache.
Bleeder wrenches come in several sizes. A set that includes 8mm, 10mm, and 12mm sizes covers most vehicles. They are small, inexpensive, and absolutely essential if you ever need to bleed your brake lines during a pad change.
Safety Equipment You Cannot Skip
Safety should always come first when working on your vehicle. Brake work involves lifting the car off the ground and handling heavy components. The right safety equipment protects you from serious injury.
Jack Stands
Never rely on a jack alone to hold your car up. Jacks can slip or fail, and the consequences are severe. Jack stands provide a stable, secure platform that keeps the vehicle at a safe working height. Always place jack stands on a flat, hard surface before you crawl under the car.
Use a floor jack to lift the vehicle, then lower it onto the stands. Double-check that the stands are locked in place before you put any weight on them. This simple habit can save your life.
Floor Jack
A floor jack raises the vehicle off the ground so you can remove the wheels. A hydraulic floor jack with a 2-ton to 3-ton capacity handles most passenger vehicles easily. Look for a jack with a low profile if you have a car with limited ground clearance.
Place the jack on the manufacturer-recommended jacking points. These are reinforced areas on the frame or body designed to support the weight of the vehicle. Using the wrong spot can damage the car or cause the jack to slip.
Gloves and Safety Glasses
Brake dust contains fine metal particles that are harmful if inhaled or if they contact your eyes. Wear safety glasses to protect your eyes when removing old pads and cleaning brake components. Heavy-duty gloves protect your hands from sharp edges, grease, and brake dust.
Nitrile gloves work well for most brake jobs. They keep your hands clean and protect against brake cleaner chemicals. A simple pair of safety glasses costs just a few dollars but provides invaluable protection.
Consumable Supplies and Chemicals
Beyond tools and safety gear, you need several consumable supplies to complete the job properly. These are items you use up during the process and may need to replace for future jobs.
Brake Cleaner
Brake cleaner is a specialized solvent that removes grease, oil, brake dust, and contaminants from brake components. You will use it to clean the caliper bracket, sliding pins, and backing plate before installing new pads. Clean surfaces help new pads seat properly and prevent noise and vibration.
Always use brake cleaner that is safe for ABS sensors and rubber components. Spray it on a cloth or directly onto parts, then wipe clean. Work in a well-ventilated area and avoid open flames, since brake cleaner is flammable.
Anti-Seize Compound
Anti-seize compound prevents metal parts from seizing together due to corrosion and heat. You apply it to the caliper sliding pins, pad contact points, and lug nut threads. This makes future brake jobs easier and prevents galling or stuck components.
Use a thin layer of anti-seize. Too much can cause the compound to get on the rotor surface, which affects braking performance. Copper-based anti-seize works well for most brake applications. Avoid using it on the pad friction surface or the rotor contact area.
Brake Fluid
You may need to add or replace brake fluid if you open the brake lines during the job. Brake fluid is hygroscopic, meaning it absorbs moisture over time. Fresh brake fluid ensures your braking system operates at peak performance and safety.
Check your vehicle manual for the correct type of brake fluid. Most cars use DOT 3 or DOT 4 fluid. Never mix different types of brake fluid, as this can cause compatibility issues and reduce braking effectiveness.
Step-by-Step Tool Usage Guide
Now that you know what tools you need, let us walk through how they fit into the actual brake pad replacement process. This gives you a clear picture of the workflow and helps you prepare everything before you start.
Step 1: Prepare the Vehicle
Park your car on a flat surface and engage the parking brake. Use the lug wrench to loosen the lug nuts on the wheel you are working on. Do not remove them yet, just break them free. This is much easier to do while the tire is still on the ground.
Step 2: Lift the Vehicle
Place the floor jack under the designated jacking point and raise the vehicle. Once it is high enough, slide the jack stands under the frame and lower the vehicle onto them. Give the car a firm push to make sure the stands are stable. Now you can safely remove the lug nuts and take off the wheel.
Step 3: Remove the Caliper
Locate the brake caliper bolts, usually found at the back of the caliper. Use your socket set and ratchet to remove them. Carefully lift the caliper off the rotor. Do not let it hang by the rubber brake hose, as this can damage the line. Use a bungee cord or wire to hang the caliper safely out of the way.
Step 4: Compress the Caliper Piston
Before you can slide the new pads in, you must compress the piston back into the caliper. Use your C-clamp or brake caliper tool to apply steady pressure. Turn the clamp slowly and evenly. If the piston is very stubborn, you may need to open the bleeder valve slightly to allow fluid to push back into the reservoir.
If your vehicle has an electronic parking brake, you may need a diagnostic tool or specific procedure to retract the rear piston. Check your service manual for guidance.
Step 5: Remove Old Pads and Install New Ones
Slide the old brake pads out of the caliper bracket. Inspect the bracket and sliding pins for wear or corrosion. Clean everything with brake cleaner. Apply a thin layer of anti-seize to contact points. Then slide the new pads into place, making sure any wear indicators are positioned correctly.
Step 6: Reassemble and Torque
Place the caliper back over the new pads and reinstall the caliper bolts. Use your torque wrench to tighten them to the manufacturer specification. Put the wheel back on, hand-tighten the lug nuts, then lower the vehicle off the jack stands. Finally, torque the lug nuts in a star pattern to ensure even pressure.
Step 7: Test the Brakes
Before you drive, pump the brake pedal several times to seat the pads against the rotors. Check the brake fluid level in the reservoir and top off if needed. Take the car for a slow test drive in a safe area, applying the brakes gently at first. Listen for any unusual sounds and feel for smooth, even braking.
Common Mistakes to Avoid
Even with the right tools, mistakes can happen. Here are some common pitfalls to watch out for during your brake pad replacement.
Skipping the torque wrench. Hand-tightening lug nuts is never a good idea. Uneven torque can cause wheels to loosen or rotors to warp. Always use a torque wrench.
Forgetting to compress the piston. If you do not push the piston back, the new pads will not fit. This is one of the most common beginner mistakes, and it wastes a lot of time and frustration.
Using the wrong brake fluid. Different vehicles require different fluid types. Mixing them can cause seal damage and braking failure. Always double-check your vehicle manual.
Not cleaning the caliper bracket. Old brake dust and corrosion can prevent new pads from sliding properly. A quick cleaning with brake cleaner goes a long way toward a quiet, smooth brake job.
Reusing old hardware. Slide pins, clips, and shims wear out over time. Reusing them can cause noise, uneven pad wear, and reduced braking performance. Replace these small parts with every brake job.
Expert Tips for a Perfect Brake Job
Here are some professional tips that make a real difference in the quality of your brake pad replacement.
Take photos before you disassemble anything. This gives you a reference for reassembly and helps you remember how everything fits together. It also makes it easier to spot anything that looks different or worn.
Apply a thin coat of brake grease to the caliper contact points on the pad ears. This reduces noise and allows the pads to slide freely. But never let grease touch the friction surface of the pad.
After installing new pads, bed them in properly. This means making several controlled stops from moderate speeds to transfer pad material evenly onto the rotor surface. Proper bedding improves braking performance and extends pad life significantly.
Keep a clean workspace. Brake dust is messy and can contaminate other surfaces. Lay down a drop cloth and wipe parts down as you go. A clean workspace also helps you spot worn or damaged components you might otherwise miss.
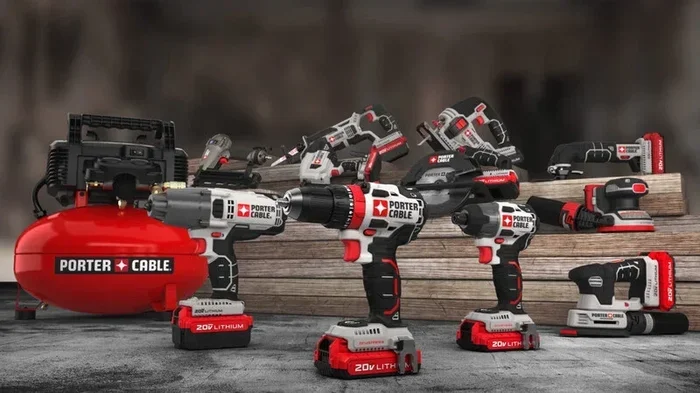
If you use an air impact wrench to loosen stubborn lug nuts, make sure you know how to properly maintain your air tools. A Porter Cable air compressor works great for this, but you need to set the PSI on your air compressor correctly to avoid damaging lug nuts or over-torquing fasteners. After completing your brake job, remember to properly reset your compressor and store it safely for future use.
What to Do After the Job
Once you have completed your brake pad replacement, there are a few final steps that ensure everything works safely and reliably.
Check your brake fluid level in the reservoir. If you compressed the piston significantly, the fluid level may have risen. You might need to remove some fluid with a turkey baster or syringe to prevent it from overflowing when you reinstall the caliper. Overflowing fluid can damage paint and create a mess.
Inspect your brake rotors while you have everything apart. Look for deep grooves, scoring, or uneven wear. If the rotors are worn beyond their minimum thickness, now is the perfect time to have them resurfaced or replaced. New pads on bad rotors will not perform well and may wear out quickly.
Reset your tire pressure monitoring system if needed. Some vehicles require a reset after wheel removal. Refer to your owner manual for the specific procedure. This is a quick step that prevents annoying dashboard warning lights.
Finally, keep track of when you changed your pads. Note the date and mileage in your car maintenance log or phone. This helps you plan for the next replacement and gives you a record of your maintenance history, which is valuable if you ever sell the vehicle.
Conclusion
Changing brake pads at home is a manageable project for almost any car owner. With the right set of tools, proper safety equipment, and a little patience, you can complete the job in about one to two hours per axle. The tools needed to change brake pads are affordable and reusable for many future repairs.
Start with the essentials like a lug wrench, socket set, torque wrench, and C-clamp. Add specialized tools like a brake caliper tool and bleeder wrench as you gain confidence. Do not forget safety gear and consumable supplies like brake cleaner and anti-seize compound.
The satisfaction of finishing a brake job yourself is hard to beat. You save money, learn valuable mechanical skills, and gain confidence for bigger projects. Grab your tools, follow the steps in this guide, and enjoy the feeling of a job well done. Your brakes will thank you, and your wallet will too.
Frequently Asked Questions
Do I need special tools to change brake pads?
You need some basic hand tools like a lug wrench, socket set, and torque wrench. A C-clamp or brake caliper tool is also essential for compressing the caliper piston. These are common tools that most home garages already have or can be purchased affordably.
Can I change brake pads without a torque wrench?
Technically yes, but it is not recommended. A torque wrench ensures you tighten lug nuts and caliper bolts to the correct specification. Over-tightening can damage components, and under-tightening is a safety hazard. A basic torque wrench costs under 30 dollars and is worth every penny.
How long does it take to change brake pads at home?
Most people can change brake pads on one axle in about one to two hours. Beginners may take a bit longer the first time, especially if they are learning the process. With practice, you will get faster and more efficient at the job.
Do I need to bleed my brakes after changing pads?
Usually no. Changing brake pads does not require opening the brake lines, so bleeding is typically unnecessary. However, if you accidentally open a bleeder valve or notice a spongy pedal after the job, you should bleed the brakes to remove any air from the system.
What size socket do I need for brake caliper bolts?
Brake caliper bolts commonly require 10mm, 12mm, 14mm, or 17mm sockets, depending on your vehicle. Check your vehicle service manual or look at the existing bolts before purchasing sockets. Having a full socket set on hand covers all the sizes you might encounter.
Is it safe to use a C-clamp instead of a brake caliper tool?
Yes, a C-clamp works perfectly fine for most brake pad replacements. Just apply steady, even pressure and avoid over-tightening. A dedicated brake caliper tool offers more even pressure distribution, but a C-clamp is a perfectly acceptable budget-friendly alternative for DIYers.