How to Attach Hose to Your Air Compressor the Right Way
Attaching a hose to your air compressor is easier than you think, but doing it the right way matters for safety and performance. This guide walks you through every step, from choosing the right hose and fittings to making a secure, leak-free connection. Whether you are a beginner or just need a refresher, you will learn how to attach hose to air compressor setups like a pro.
So you just bought an air compressor, and now you need to connect a hose. Maybe you are setting up in your garage, or you are getting ready for a construction project. Either way, how to attach hose to air compressor is a question that comes up a lot, and it is a lot simpler than most people think.
Attaching an air hose might look intimidating at first. There are fittings, couplers, pressure ratings, and different thread types to consider. But once you understand the basics, the whole process takes just a few minutes. This guide will show you exactly how to do it, step by step, so you can get back to your work without any frustration.
We will cover everything from picking the right hose to making a secure connection and avoiding the mistakes that trip up beginners. By the end, you will feel confident every time you hook up your compressor. Let us get started.
Key Takeaways
- Choose the Right Hose: Match hose diameter, length, and material to your compressor and tools for best performance.
- Use Proper Fittings: Quick-connect couplers and correct thread types prevent leaks and make connections effortless.
- Follow a Step-by-Step Process: Preparation, connection, and testing ensure a safe and reliable setup every time.
- Avoid Common Mistakes: Skipping thread tape, overtightening fittings, and ignoring pressure ratings cause problems.
- Maintain Your Hose: Regular inspection, cleaning, and proper storage extend the life of your air hose and compressor.
- Power Matters: If using a generator to run your compressor, make sure it can handle the wattage demands.
- Safety First: Always release pressure before connecting or disconnecting your hose.
📑 Table of Contents
- Understanding Your Air Compressor Hose Setup
- How to Attach Hose to Air Compressor: Step-by-Step
- Types of Air Hoses and Which One to Choose
- Common Mistakes to Avoid When Attaching Your Hose
- Tips for Maintaining Your Air Hose and Connection
- Using a Generator to Power Your Air Compressor
- Quick Tips for a Perfect Hose Connection Every Time
- Conclusion
Understanding Your Air Compressor Hose Setup
Before you attach anything, it helps to understand what you are working with. Every air compressor setup has a few key parts that work together. Knowing what each part does makes the whole process much easier.
The Air Hose
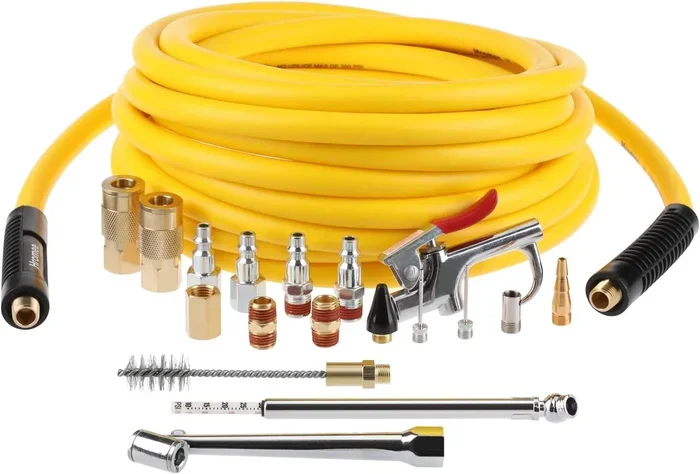
The air hose is the rubber or PVC tube that carries compressed air from your compressor to your tools. Hoses come in different lengths, usually ranging from 25 feet to 100 feet. They also come in different diameters, with 3/8 inch and 1/4 inch being the most common sizes for home and workshop use.
Longer hoses give you more reach, but they can also reduce air pressure over distance. Shorter hoses maintain better pressure but limit your working range. For most home projects, a 50-foot hose with a 3/8-inch diameter strikes a good balance between reach and airflow.
Compressor Fittings and Couplers
Fittings are the metal connectors that join your hose to the compressor. The most common type is the quick-connect fitting, which lets you plug and unplug your hose without any tools. There are two parts to a quick-connect system: the male plug (on the compressor or tool) and the female coupler (on the hose end).
Some compressors use threaded fittings instead. These require you to screw the hose on by hand or with a wrench. Threaded fittings come in different sizes, so you need to match the thread type on your compressor with the thread type on your hose.
Pressure Regulator and Gauges
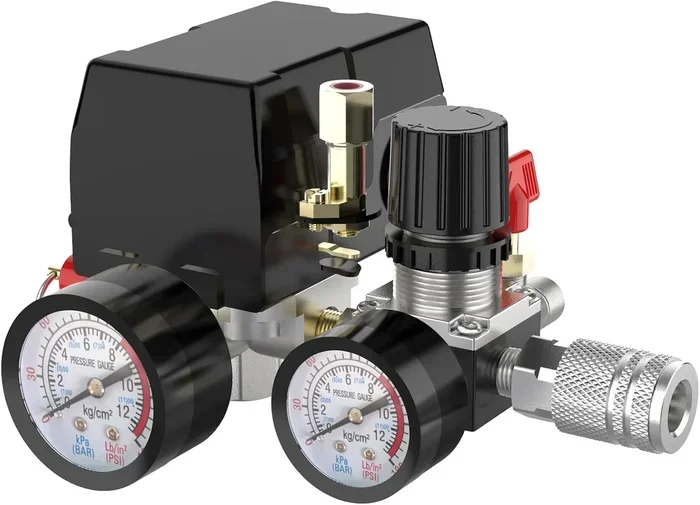
Your compressor has a pressure regulator that controls how much air flows through the hose. There is usually a gauge on the compressor that shows the tank pressure, and another gauge (or the regulator itself) that shows the output pressure going to the hose. Setting the right pressure is important because too much pressure can damage your tools, and too little pressure means they will not work properly.
How to Attach Hose to Air Compressor: Step-by-Step
Now let us get into the actual process. This is the core of what you came here to learn. Follow these steps carefully, and you will have a solid connection every single time.
Step 1: Turn Off and Unplug Your Compressor
Safety always comes first. Before you touch any fittings, make sure your compressor is completely off and unplugged from the power source. If your compressor runs on gas, turn off the fuel valve and let the engine cool down. This prevents accidental startups that could cause injuries.
Step 2: Release Any Remaining Pressure
Even after turning off the compressor, there may still be air trapped in the tank and hose. Locate the drain valve on the tank and open it to release the pressure. You can also pull the trigger on your pneumatic tool to let any air in the hose escape. Wait until the pressure gauge reads zero before moving on.
Step 3: Inspect the Hose and Fittings
Take a moment to look over your hose and fittings. Check for cracks, cuts, or worn spots on the hose. Look at the coupler and plug for any damage or debris. A damaged hose can burst under pressure, which is a serious safety hazard. If anything looks worn or broken, replace it before you proceed.
Step 4: Apply Thread Tape (If Using Threaded Fittings)
If your compressor uses threaded fittings instead of quick-connect, you will need to wrap the male threads with thread seal tape (also called Teflon tape). Wrap the tape clockwise around the threads, about three to five times. This creates a tight seal and prevents air leaks. Make sure the tape is snug but not overlapping the end of the threads.
Step 5: Connect the Hose to the Compressor
Now for the actual connection. If you are using a quick-connect fitting, simply push the male plug firmly into the female coupler until you hear a click. You should feel it lock into place. For threaded fittings, screw the male end into the female fitting by hand first, then tighten it with a wrench. Do not overtighten, as this can strip the threads or crack the fittings.
Make sure the connection is snug and secure. Give it a gentle tug to confirm it will not come loose. A loose hose under pressure can whip around and cause serious injury.
Step 6: Set the Pressure Regulator
Once the hose is connected, turn on your compressor and let it build up pressure. Then adjust the regulator to match the pressure requirement of your tool. Most pneumatic tools list their required pressure on the tool itself or in the manual. Setting the regulator correctly ensures your tools run smoothly and efficiently.
Step 7: Test for Leaks
After connecting everything and setting the pressure, it is time to test for leaks. Listen for any hissing sounds around the fittings. You can also mix a little dish soap with water and spray it on the connections. If you see bubbles forming, you have a leak. Simply tighten the fitting a little more or reapply thread tape to fix it.
Types of Air Hoses and Which One to Choose
Not all air hoses are the same. Choosing the right one for your setup makes a big difference in performance and durability. Here is a quick look at the most common types.
Rubber Hoses
Rubber hoses are the most durable option. They handle high pressure well, resist abrasion, and stay flexible even in cold weather. They are also heavier than other types. If you use your compressor frequently or in tough conditions, a rubber hose is a great choice.
PVC Hoses
PVC hoses are lightweight and affordable. They work well for light-duty tasks around the home. However, they can become stiff in cold temperatures and are not as resistant to abrasion as rubber. They are a good option for occasional use or workshop tasks.
Polyurethane Hoses
Polyurethane hoses offer a nice middle ground. They are lightweight like PVC but more durable and flexible. They resist kinking and abrasion better than PVC hoses. If you want something that is easy to move around but still holds up well, polyurethane is worth considering.
| Hose Type | Durability | Weight | Best For |
|---|---|---|---|
| Rubber | High | Heavy | Heavy-duty, frequent use |
| PVC | Medium | Light | Light-duty, occasional use |
| Polyurethane | Medium-High | Light | Balanced use, mobility |
Common Mistakes to Avoid When Attaching Your Hose
Even experienced users sometimes make mistakes when setting up their air compressor hose. Here are the most common errors and how to avoid them.
Skipping Thread Tape
This is the number one mistake people make with threaded fittings. Skipping thread tape almost always leads to air leaks. It takes just a few seconds to wrap the tape, and it saves you from frustration later. Always use thread tape with threaded connections.
Using the Wrong Size Fittings
Not all fittings are the same size. Using a fitting that does not match your hose or compressor can cause leaks or even prevent the connection from working at all. Always check the diameter and thread type before purchasing fittings or hoses.
Overtightening the Connection
It might seem like tighter is better, but overtightening can crack fittings, strip threads, or damage the hose end. Hand-tighten first, then give it just a quarter turn with a wrench if needed. That is usually enough.
Ignoring Pressure Ratings
Every hose and fitting has a maximum pressure rating. Going over that rating can cause the hose to burst, which is extremely dangerous. Always check the rating on your hose and make sure your compressor does not exceed it.
Forgetting to Release Pressure Before Disconnecting
Never disconnect a hose while the compressor is still pressurized. Always release the pressure first by opening the drain valve and pulling the tool trigger. A pressurized hose that suddenly disconnects can whip around violently and cause injuries.
Tips for Maintaining Your Air Hose and Connection
A good hose connection does not just happen once. Regular maintenance keeps everything working smoothly and safely. Here are some simple tips to follow.
Inspect Your Hose Regularly
Before each use, give your hose a quick visual inspection. Look for cracks, cuts, bulges, or worn spots. If you find any damage, replace the hose before using it. A small crack can turn into a big problem under pressure.
Keep Fittings Clean
Dirt and debris can build up on fittings over time, which can cause leaks or make connections difficult. Wipe down your fittings after each use and store them in a clean, dry place.
Store Your Hose Properly
Do not leave your hose coiled up in a damp or sunny area for long periods. UV light and moisture can degrade the hose material over time. Use an air hose reel to keep your hose organized and protected when not in use.
Replace Worn Couplers
The quick-connect couplers on your hose and compressor wear out over time. If you notice that your connection feels loose or does not lock in as firmly as it used to, it might be time to replace the coupler. New couplers are inexpensive and easy to swap out.
Using a Generator to Power Your Air Compressor
Sometimes you need to run your air compressor away from a wall outlet. Maybe you are working on a job site or your garage does not have enough outlets. In these situations, a portable generator can be a great solution.
Before you try this, you need to understand your power needs. Air compressors can draw a lot of electricity, especially when starting up. You need a generator that can handle the starting wattage and running wattage of your compressor.
A good rule of thumb is to check the amps on your compressor and use a wattage calculator to determine how much power you need. If you are unsure about your home electrical setup, you might want to look into how many watts your generator needs to run a house as a starting point for understanding power requirements.
When using a generator, always follow the manufacturer instructions. Make sure the generator is properly grounded and rated for the compressor load. If you plan to run the generator and compressor together regularly, you may want to consider a permanent setup. Learning how to connect a generator to your house safely can help you set up a reliable power source for your tools.
It also helps to understand how the generator itself works so you can troubleshoot any issues. Check out our guide on how generators work for a deeper understanding of the basics.
Before starting the generator, make sure you know the proper startup procedure. You can refer to our guide on how to start a generator to make sure you follow the correct steps safely.
Quick Tips for a Perfect Hose Connection Every Time
- Always check the pressure rating of your hose before connecting it to the compressor.
- Use quick-connect fittings whenever possible for faster, tool-free connections.
- Keep a spare coupler in your toolbox in case one gets damaged.
- Label your hose ends if you use multiple hoses for different tools.
- Lubricate the coupler o-ring occasionally with a silicone-based lubricant to keep it sealing properly.
- Never use a damaged hose even if the damage looks minor.
- Keep a small wrench near your compressor for tightening threaded fittings on the go.
Conclusion
Learning how to attach hose to air compressor properly is one of the most useful skills you can pick up. It only takes a few minutes, but it makes every single project safer and more efficient. From choosing the right hose and fittings to following the step-by-step connection process and avoiding common mistakes, this guide covers everything you need to know.
Remember to always prioritize safety. Release pressure before connecting or disconnecting, check for leaks after every setup, and inspect your hose regularly. A little maintenance goes a long way in keeping your compressor and hose working reliably for years.
Now that you know the right way to do it, go ahead and hook up that hose with confidence. Your next project is waiting, and you are ready to tackle it the right way.
Frequently Asked Questions
Can I use any air hose with my compressor?
Not exactly. You need to match the hose diameter, length, and pressure rating to your compressor and the tools you plan to use. Check your compressor manual for recommended hose specifications before purchasing a replacement or new hose.
What is the difference between quick-connect and threaded fittings?
Quick-connect fittings allow you to plug and unplug the hose without any tools, making them fast and convenient. Threaded fittings require you to screw the hose on by hand or with a wrench, which takes a bit longer but can sometimes provide a more secure connection.
How do I know if my hose connection is leaking?
Listen for hissing sounds near the fittings and visually inspect the connection. You can also spray a soap and water mixture on the connection. If bubbles appear, you have a leak. Tighten the fitting or reapply thread tape to fix it.
Can I run my air compressor with a portable generator?
Yes, but you need to make sure your generator can handle the compressor’s power requirements. Check the starting and running wattage of your compressor and compare it to your generator’s capacity to avoid overloading the system.
How often should I replace my air hose?
There is no set schedule, but you should inspect your hose before each use. Replace it as soon as you notice cracks, cuts, bulges, or any visible damage. A well-maintained hose can last several years with proper care and storage.
Do I need thread tape every time I connect my hose?
Only if your compressor and hose use threaded fittings. Quick-connect fittings do not require thread tape. If you are unsure which type your compressor uses, check the fitting on the air outlet of your compressor.