Your Complete Guide to Air Compressor Installation
Our complete guide to air compressor installation walks you through every step, from choosing the right unit to finishing the setup like a pro. Whether you are installing a portable or stationary compressor, you will find clear tips, practical examples, and expert advice here. We cover preparation, wiring, placement, and common mistakes so your compressor runs safely and efficiently for years to come.
Installing an air compressor might sound like a big job. But with the right knowledge, it is a task most people can handle on their own. Whether you are setting up a portable air compressor in your garage or a large stationary air compressor in a workshop, the process follows a clear path. This guide covers everything you need to know. You will learn how to choose the right unit, prepare your space, wire it up safely, and avoid the mistakes that trip up beginners. Let us walk through it together.
A proper air compressor installation does more than just get the machine running. It ensures your compressor operates safely, uses energy efficiently, and lasts for many years. A poorly installed compressor can lead to leaks, electrical problems, excess noise, and even safety hazards. Taking the time to do the job right pays off in performance and peace of mind. This guide breaks the entire process into simple, easy-to-follow steps. You do not need to be a professional mechanic or electrician to get this done.
Key Takeaways
- Right compressor choice matters: Picking the correct size and type for your space and needs makes installation much easier.
- Preparation prevents problems: Proper planning of the foundation, electrical supply, and ventilation saves time and money later.
- Follow each step carefully: From mounting to wiring to testing, every step in air compressor installation needs attention to detail.
- Avoid common mistakes: Skipping vibration pads, ignoring electrical requirements, and poor placement are top errors to steer clear of.
- Maintenance keeps it running: Regular checks after installation extend the life of your compressor and improve performance.
- Safety comes first: Always follow the manufacturer’s guidelines and local codes during the setup process.
📑 Table of Contents
- What Is Air Compressor Installation?
- Choosing the Right Air Compressor for Your Space
- Preparing for Air Compressor Installation
- Step-by-Step Air Compressor Installation
- Common Air Compressor Installation Mistakes to Avoid
- Maintaining Your Air Compressor After Installation
- Final Thoughts on Air Compressor Installation
What Is Air Compressor Installation?
Air compressor installation is the full process of setting up your compressor unit so it works safely and effectively. It involves more than just unboxing the machine and plugging it in. You need to think about where it goes, how it sits, what power it needs, and how all the parts connect together. A good setup also considers ventilation, vibration control, and access for maintenance.
The process can look different depending on the type of compressor you have. A small portable air compressor for home use has much simpler needs than a large industrial stationary air compressor. But the core principles stay the same. You want a stable base, a proper power source, correct connections, and a safe operating environment. When you take care of these basics, the compressor runs smoother and lasts longer.
Why Proper Installation Matters
Skipping steps or rushing through the setup can cause real problems. A compressor that is not level may vibrate too much and damage its internal parts over time. Wrong wiring can trip breakers or even create a fire risk. Poor placement can block airflow and cause the unit to overheat. All of these issues are avoidable with a little planning and care during air compressor installation.
Choosing the Right Air Compressor for Your Space
Before you start any physical work, you need the right compressor for your needs. Not every compressor setup is the same. The wrong size or type will make installation harder and operation less efficient. Take a moment to think about what you will use the compressor for and where it will live.
Portable vs. Stationary Compressors
A portable air compressor is compact, lightweight, and easy to move around. These units work great for home garages, small workshops, and on-site jobs. They usually have smaller tanks and lower horsepower. Installation is simple because you just place them where you need them and plug them into a standard outlet.
A stationary air compressor is built to stay in one place. These machines have larger tanks, bigger motors, and higher output. They are common in professional workshops, factories, and auto body shops. Stationary compressor installation requires more planning. You may need a dedicated electrical circuit, a concrete foundation, and proper venting for heat and exhaust.
Matching Size to Your Needs
Compressor size is measured in horsepower, tank size, and cubic feet per minute, or CFM. For light tasks like inflating tires or powering small nail guns, a 1 to 2 horsepower unit works well. For heavier tools like impact wrenches or sandblasters, you need a larger compressor with higher CFM ratings. Choosing the right size means your compressor will not run constantly or struggle to keep up with demand.
| Compressor Type | Best For | Tank Size | Horsepower Range |
|---|---|---|---|
| Portable Electric | Home garage, light tasks | 1-6 gallons | 1-2 HP |
| Portable Gas | Construction sites | 5-10 gallons | 3-5 HP |
| Stationary Electric | Workshop, professional use | 20-80+ gallons | 5-10+ HP |
| Stationary Gas | Heavy industrial use | 50-120+ gallons | 10-50+ HP |
Preparing for Air Compressor Installation
Preparation is the most important part of air compressor installation. Rushing into the setup without proper planning leads to headaches later. Take the time to check your space, your power supply, and your tools before you start.
Choosing the Right Location
Where you place your compressor matters a lot. You want a spot that is dry, well-ventilated, and easy to access. Avoid damp areas like unheated basements where moisture can build up inside the tank. Keep the unit away from flammable materials and direct sunlight. Good airflow around the compressor helps it cool down after use and prevents overheating.
Think about noise too. Compressors can be loud, especially gas-powered models. If you are working in a shared space or near neighbors, consider placing the unit in a separate room or building. Some people use a soundproof enclosure to reduce compressor noise during operation.
Building or Choosing a Foundation
A solid foundation reduces vibration and keeps the compressor stable. For smaller portable units, a flat concrete floor or heavy-duty rubber mat works fine. For larger stationary compressors, a poured concrete pad is ideal. The pad should be at least a few inches larger than the base of the machine on all sides.
Some installers use vibration isolation pads underneath the unit. These rubber or cork pads absorb shock and reduce wear on both the compressor and the floor. This simple step makes a big difference in how long your machine lasts.
Checking Electrical Requirements
Electric compressors need a dedicated circuit with the right voltage and amperage. Check the nameplate on your compressor for its electrical specifications. Most home units run on a standard 120-volt outlet, but larger compressors need 240 volts. Never plug a compressor into an extension cord or a shared circuit. This can cause voltage drops, tripped breakers, and potential fire hazards.
If you are not comfortable working with electrical wiring, hire a licensed electrician. They can install the right outlet and circuit breaker for your compressor’s needs. This is one area where it is worth spending a little extra to get it right.
Gathering Your Tools and Supplies
Before you begin the actual setup, gather everything you need. Here is a simple checklist to follow:
- Wrench set for tightening fittings and bolts
- Screwdrivers (Phillips and flathead)
- Drill and drill bits if mounting the unit
- Vibration pads or isolation mounts
- Teflon tape for sealing threaded connections
- Pressure gauge to test output
- Air hose and fittings
- Circuit tester for electrical safety checks
- Level to ensure the compressor sits evenly
Having all of these ready before you start keeps the process smooth and avoids frustrating pauses mid-installation.
Step-by-Step Air Compressor Installation
Now that you have the right compressor and a solid plan, it is time to start the actual setup. Follow these steps in order for the best results.
Step 1: Unbox and Inspect the Unit
Carefully remove the compressor from its packaging. Check all parts against the manual to make sure nothing is missing or damaged. Look for dents, cracks, or loose components. If anything looks off, contact the manufacturer or seller before you proceed. It is much easier to handle a replacement before you start the setup.
Step 2: Position and Level the Compressor
Place the compressor on its designated spot. Use a level to make sure it sits flat and even. If you are using vibration pads, put them down first and then set the unit on top. A level compressor runs smoother and puts less stress on the motor and tank. Take a few extra minutes to get this right.
Step 3: Connect the Air Tank and Lines
Attach the air tank to the compressor if it is a separate piece. Use the provided fittings and hand-tighten them first, then snug them up with a wrench. Wrap all threaded connections with Teflon tape to prevent air leaks. Connect the air hose to the output fitting and make sure the connection is tight.
Attach the compressor regulator to control the output pressure. This lets you adjust the air pressure to match different tools. A quick-connect fitting makes it easy to switch between hoses and tools without losing air pressure.
Step 4: Set Up the Electrical Connection
Connect the compressor to its dedicated electrical circuit. Make sure the power is off at the breaker before you wire anything. Follow the wiring diagram in the owner’s manual exactly. If your compressor has a pressure switch, make sure it is properly connected so the unit turns on and off at the correct pressure levels.
Once everything is wired, turn the breaker back on and listen for the compressor to start. It should run smoothly without any unusual sounds. If you hear grinding, clicking, or humming that does not stop, turn it off and check your connections.
Step 5: Test the System
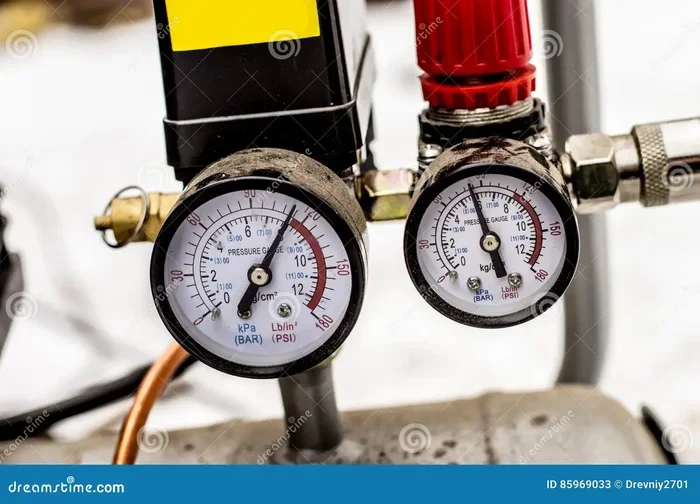
Let the compressor run and build up pressure. Watch the pressure gauge on the tank and the regulator. The compressor should shut off automatically when it reaches the cut-out pressure and turn back on when the pressure drops to the cut-in level. This is the job of the compressor pressure switch.
Attach a tool or air hose to test the output. Check all connections for leaks by listening for hissing sounds or using a soapy water solution on the fittings. Bubbles mean there is a leak that needs tightening or resealing. Fix any leaks before you put the compressor into regular use.
Step 6: Install Safety Features
Do not skip safety during air compressor setup. Install a compressor safety valve or relief valve if your model does not already have one. This prevents dangerous pressure buildup in the tank. Make sure the drain valve at the bottom of the tank is accessible so you can release moisture regularly.
If you are using a gas-powered compressor indoors, you need proper ventilation to prevent carbon monoxide buildup. Never run a gas compressor in an enclosed space without airflow. For electric compressors, use a ground fault circuit interrupter, or GFCI, outlet for extra electrical safety.
Common Air Compressor Installation Mistakes to Avoid
Even experienced DIYers can make mistakes during compressor setup. Knowing what to avoid saves time, money, and frustration. Here are the most common errors and how to prevent them.
Skipping the Foundation
Placing a compressor directly on an uneven or flimsy surface causes excessive vibration. Over time, this vibration loosens fittings, damages the tank, and wears out motor mounts. Always use a proper base, mat, or concrete pad. This one step makes your setup more stable and safer.
Ignoring Electrical Requirements
Plugging a compressor into the wrong outlet or sharing a circuit is a common and dangerous mistake. The compressor needs its own dedicated circuit with the correct voltage. Check the manual for electrical specs before you start. If you are unsure, have an electrician review your setup.
Poor Ventilation Planning
Compressors generate a lot of heat during operation. Placing them in a tight, enclosed space without airflow leads to overheating and premature motor failure. Give your compressor room to breathe on all sides. A general rule is to keep at least 12 inches of clearance around the unit for proper compressor ventilation.
Forgetting to Drain the Tank
Moisture collects inside the air tank over time. If you do not drain it regularly, rust and corrosion can weaken the tank and eventually cause it to fail. Make draining the tank part of your routine after each use. The drain valve is usually at the bottom of the tank and opens with a simple pull or twist.
Using the Wrong Fittings or Hoses
Not all air hoses and fittings are the same. Using a hose with the wrong diameter or a fitting that does not seal properly leads to air leaks and pressure loss. Always match your hoses and fittings to your compressor’s specifications. Look for hoses rated for the pressure your compressor produces.
Neglecting the Oil
Many compressors need oil to lubricate the motor and moving parts. Forgetting to check or change the oil leads to increased friction, overheating, and early wear. Check the oil level before each use and change it according to the manufacturer’s schedule. Use only the oil type recommended in the manual.
Maintaining Your Air Compressor After Installation
Once your air compressor setup is complete, the work is not done. Regular maintenance keeps the compressor running efficiently and extends its lifespan. A well-maintained compressor also uses less energy and delivers more consistent performance.
Daily and Weekly Maintenance
After each use, drain the moisture from the tank. Check the oil level if your compressor is oil-lubricated. Listen for any unusual sounds during operation. Once a week, inspect all hoses and fittings for leaks or wear. Tighten any loose connections and replace damaged hoses right away.
Monthly and Seasonal Maintenance
Once a month, check the air filter and clean or replace it if it looks dirty. A clogged filter makes the motor work harder and reduces efficiency. Every few months, inspect the belt if your compressor uses one. A worn belt can slip and cause the compressor to underperform.
At the end of each season, give your compressor a more thorough check. Clean the cooling fins, inspect the electrical connections, and test the pressure switch to make sure it still activates at the correct pressures. This seasonal routine catches small problems before they become big ones.
When to Call a Professional
Most maintenance tasks are simple and safe to do yourself. But some jobs are best left to the pros. If you notice the compressor is not building pressure, making loud noises, or tripping the breaker, call a qualified technician. Attempting complex repairs without the right knowledge can be dangerous and may void your warranty.
Final Thoughts on Air Compressor Installation
Air compressor installation does not have to be intimidating. With the right preparation, the correct tools, and a careful step-by-step approach, you can set up your compressor safely and confidently. The key is to take your time, follow the manufacturer’s instructions, and never skip safety steps. A properly installed compressor gives you reliable power for years of DIY projects, professional work, or workshop tasks.
Remember that every compressor is a little different. Always refer to your specific model’s manual for guidance. The tips and steps in this guide apply to most setups, but your compressor may have unique requirements. When in doubt, consult the manufacturer or a professional installer. A little extra care at the start means fewer problems down the road.
Now that you have the knowledge, it is time to get your compressor set up and ready to go. Whether you are powering pneumatic tools, inflating tires, or running a spray gun, a properly installed compressor makes every job easier and safer. Enjoy the process, take pride in a job well done, and get ready to put your new compressor to work.
Frequently Asked Questions
How long does air compressor installation take?
For most home and workshop setups, air compressor installation takes between one and three hours. Portable units with simple electrical needs go faster. Larger stationary compressors that require a concrete pad, dedicated wiring, or venting may take half a day or more. The key is to not rush and follow each step carefully.
Do I need an electrician to install my air compressor?
You do not need an electrician for most portable electric compressors that plug into a standard outlet. However, if your compressor requires a 240-volt circuit or a dedicated electrical line, hiring a licensed electrician is a smart move. They ensure the wiring is safe and up to code.
What is the best location for an air compressor?
The best location is a dry, well-ventilated area with a flat, stable floor. Keep the compressor away from moisture, flammable materials, and direct sunlight. If noise is a concern, place it in a separate room or use a soundproof enclosure. Good airflow around the unit prevents overheating.
How often should I drain my air compressor tank?
You should drain the tank after every use or at least once a week if you use the compressor regularly. Moisture from compressed air collects at the bottom of the tank and can cause rust if left too long. The drain valve is easy to access and only takes a few seconds to open.
Can I install an air compressor outdoors?
Yes, you can install a compressor outdoors, but you need to protect it from rain, snow, and extreme temperatures. A covered shed or canopy works well. Make sure the area has good airflow and is level. Electric compressors need a weatherproof outlet, and gas compressors need proper exhaust ventilation.
What tools do I need for air compressor installation?
The basic tools include a wrench set, screwdrivers, a drill, a level, Teflon tape, vibration pads, and a pressure gauge. You may also need electrical tools like a circuit tester and wire strippers if you are wiring a dedicated circuit. Having everything ready before you start makes the process much smoother.
=== CONCLUSION ===
Air compressor installation is a straightforward process when you take it step by step. From choosing the right unit and preparing your space to wiring it up and testing the system, each part of the setup plays an important role in how well your compressor performs. The time you invest in doing the job right pays off in reliability, safety, and long-term savings. Follow the tips in this guide, avoid the common mistakes, and your compressor will serve you well for years to come. Now go ahead and get your setup done with confidence.