What Tools Do You Need to Change a Tire the Right Way
Knowing the right tools to change a tire can save you time, money, and stress on the road. You need a reliable jack, a sturdy lug wrench, a spare tire, and a few extra essentials to handle any flat tire situation. This guide walks you through every tool required for a safe and proper tire change.
There is nothing quite like the sinking feeling when you hear that telltale thump-thump-thump while driving. A flat tire can strike at the worst possible moment, whether you are on a highway, a quiet country road, or just pulling into your driveway. But here is the good news. If you have the right tools to change a tire, you can handle the situation like a pro. Most people can swap out a flat tire in under twenty minutes once they know what they are doing.
Many drivers skip learning this basic car maintenance skill. They assume they will never need it. Or they rely on roadside assistance for every little problem. But having the proper roadside repair knowledge and equipment gives you independence. It saves you money. And most importantly, it keeps you safe when you are stranded on the side of the road. This guide covers every single tool you need to change a tire the right way.
Key Takeaways
- A hydraulic jack and lug wrench are the two most critical tools for any tire change.
- A well-stocked emergency kit should include wheel wedges, a flashlight, and gloves.
- Knowing how to use each tool properly prevents injuries and vehicle damage.
- A torque wrench ensures your lug nuts are tightened to the correct specification.
- Regularly checking your spare tire and tools keeps you prepared for emergencies.
- An air compressor can help you reinflate your tire after a repair or if pressure drops.
📑 Table of Contents
- The Essential Tools for Tire Changing
- Recommended Tools for a Better Tire Change Experience
- How to Use Your Tire Changing Tools Properly
- Common Mistakes People Make When Changing a Tire
- Building a Complete Roadside Emergency Kit
- How to Maintain Your Tire Changing Tools
- When to Call for Professional Help
- Final Thoughts
The Essential Tools for Tire Changing
Before you can change a tire, you need to know what tools you are working with. The good news is that the list is not long. Most vehicles come with the basics already in the trunk. But knowing what each tool does and how to use it properly makes all the difference. Let us break down the essential tire changing equipment you need.
1. Car Jack
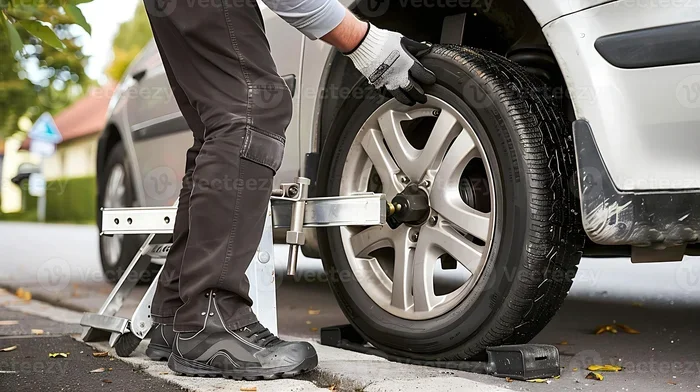
The jack is the tool that lifts your vehicle off the ground. Without it, you cannot remove the wheel. Most cars come with a scissor jack or a hydraulic jack in the trunk. A hydraulic jack is easier to use because it requires less physical effort. You simply pump the handle, and the vehicle rises smoothly.
Scissor jacks work too, but they require more turning and effort. They also tend to be less stable on soft ground. Whatever type of jack you have, make sure it is rated for your vehicle’s weight. Check your owner’s manual for the correct jack points on your car. Placing the jack in the wrong spot can damage the frame or cause the vehicle to slip off the jack.
2. Lug Wrench
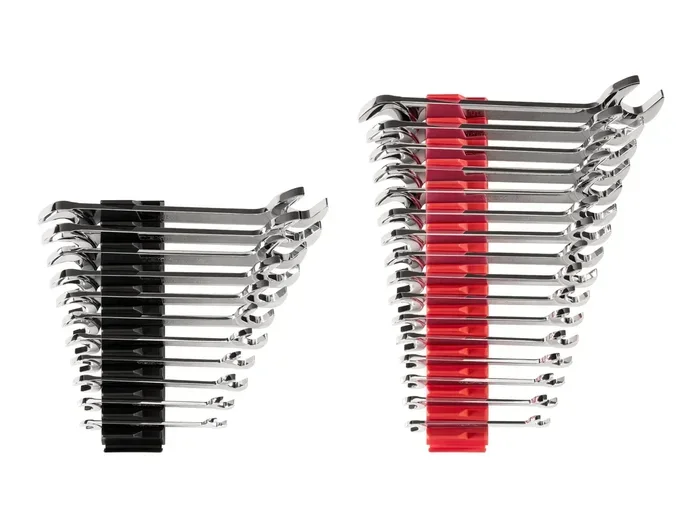
A lug wrench, sometimes called a wheel wrench, is used to loosen and tighten the lug nuts that hold your wheel in place. Most vehicles come with a basic L-shaped lug wrench in the trunk. These work fine for most situations. However, if you want something more reliable, consider investing in a cross-shaped lug wrench or a breaker bar.
A breaker bar gives you much more leverage. This makes it easier to loosen stubborn lug nuts, especially if they have been tightened over time or have become corroded. When choosing a lug wrench, make sure it fits your lug nuts properly. Using the wrong size can strip the nuts and make the job much harder.
3. Spare Tire
You cannot change a tire without a spare. Most new cars come with a compact spare, sometimes called a “donut.” These are smaller and lighter than full-size tires. They work great for getting you to a repair shop or a safe location. However, compact spares have speed and distance limitations. You should not drive faster than 50 miles per hour on a donut, and you should not travel more than 50 to 70 miles on one.
Some older vehicles or trucks come with full-size spare tires. These are much better because you can drive on them just like a regular tire. No matter what type of spare you have, check its tire pressure regularly. A spare that is flat is useless when you actually need it.
4. Wheel Wedges or Chocks
Wheel wedges, also called chocks, are small blocks that prevent your vehicle from rolling while you are underneath it. This is a safety step that many people skip. But it is incredibly important. If your car rolls while you are working on it, the consequences can be severe.
You can buy dedicated wheel wedges, or you can use bricks, large rocks, or even wooden blocks in a pinch. Place the wedges behind the tires that are opposite the flat. For example, if your front left tire is flat, place wedges behind the rear right tire. This prevents the vehicle from rolling in either direction.
5. Flashlight
Flats tend to happen at the worst times. Often, it is dark, raining, or both. A reliable flashlight is an essential tool for any roadside emergency kit. You need good light to see the lug nuts, the jack points, and the spare tire. A headlamp is even better because it leaves your hands free to work.
Keep a durable, rechargeable flashlight in your trunk at all times. Avoid using your phone flashlight as your primary light source. It drains your battery quickly and does not provide the same level of illumination. A quality flashlight can make a nighttime tire change much safer and easier.
6. Gloves
Tire changing is a dirty job. Your hands will get greasy, dirty, and possibly cut from sharp edges on the wheel or tire. A sturdy pair of work gloves protects your hands and gives you a better grip on tools and tire components. Mechanic gloves with rubber palms are especially good because they provide both protection and grip.
You do not need expensive gloves. A simple pair of durable work gloves will do the job. Just make sure they fit well and do not restrict your movement. You need to be able to grip the lug wrench and handle the tire comfortably.
Recommended Tools for a Better Tire Change Experience
The essential tools will get the job done. But if you want a smoother, safer, and more efficient tire changing experience, consider adding a few more items to your kit. These tools make the process easier and help you avoid common problems.
7. Torque Wrench
After you put the new tire on, you need to tighten the lug nuts to the correct specification. Too loose, and the wheel could come off while driving. Too tight, and you risk damaging the wheel studs or the brake rotor. A torque wrench allows you to apply the exact amount of force needed.
Most vehicles require lug nuts to be tightened between 80 and 100 foot-pounds. Check your owner’s manual for the exact specification. Using a torque wrench takes the guesswork out of the process. It gives you confidence that your wheel is secure.
8. Air Compressor
An air compressor is a handy tool to have in your emergency kit. After a tire repair or if your spare tire has lost some pressure over time, you need to reinflate it. A portable compressor plugs into your car’s cigarette lighter or USB port and can quickly bring your tire up to the proper pressure.
Many people wonder do I need an air compressor for tire maintenance. The answer is not strictly necessary, but it is very helpful. It gives you the ability to check and adjust tire pressure anywhere, not just at a gas station. This is especially useful if you notice a slow leak and want to top off your tire before driving to a repair shop.
9. Tire Pressure Gauge
Speaking of tire pressure, a quality pressure gauge is a must-have tool. You should check your spare tire’s pressure at least once a month. Many gas station air pumps have gauges, but they are often inaccurate. Having your own reliable gauge ensures you always know exactly what your tire pressure is.
A digital pressure gauge is the most accurate option. They are inexpensive and easy to use. Simply press the gauge onto the valve stem, and the reading appears on the screen. Keeping your tires properly inflated improves fuel efficiency, handling, and tire life.
10. Reflective Triangles or Flares
Safety should always come first when you are changing a tire on the roadside. Reflective triangles or flares alert other drivers to your presence. Place them behind your vehicle, about 50 to 100 feet back, to give approaching drivers plenty of warning.
Many emergency kits come with reflective triangles. If yours does not, buy a set and keep them in your trunk. They are small, lightweight, and could save your life in a low-visibility situation. Never change a tire on a busy road without proper visibility markers.
11. Penetrating Oil
Rust and corrosion can make lug nuts incredibly difficult to remove. A can of penetrating oil, such as WD-40 or PB Blaster, can loosen even the most stubborn nuts. Spray the oil on the lug nuts and let it sit for a few minutes before trying to remove them.
This is especially useful if your vehicle has been sitting for a while or if you live in a humid or coastal area where corrosion is common. A small bottle of penetrating oil weighs almost nothing and takes up minimal trunk space. But it can save you a lot of frustration and physical effort.
How to Use Your Tire Changing Tools Properly
Having the right tools is only half the battle. You also need to know how to use them correctly. Improper technique can damage your vehicle, your tools, or even injure you. Here is a step-by-step guide to using your tire changing tools safely and effectively.
Step-by-Step Tire Change Process
Follow these steps carefully whenever you need to swap out a flat tire:
- Pull over safely. Find a flat, stable surface away from traffic. Turn on your hazard lights.
- Apply the parking brake. This prevents the vehicle from rolling while you work.
- Place wheel wedges behind the tires. Use your chocks or wedges to secure the vehicle.
- Remove the hubcap or wheel cover. If your wheels have a cover, pry it off with the flat end of your lug wrench.
- Loosen the lug nuts. Use your lug wrench to turn each nut counterclockwise. Do not remove them completely yet. Just break the resistance.
- Position the jack. Place the jack under the vehicle’s frame near the flat tire. Refer to your owner’s manual for the correct jack point.
- Lift the vehicle. Raise the jack until the flat tire is about six inches off the ground. Never put any part of your body under the vehicle while it is on a jack.
- Remove the lug nuts completely. Now you can unscrew them all the way and set them aside in a safe place.
- Remove the flat tire. Pull the tire straight toward you to remove it from the wheel base. Set it flat on the ground.
- Mount the spare tire. Lift the spare onto the wheel base and push it in until the bolts show through the holes.
- Hand-tighten the lug nuts. Put the nuts back on and tighten them by hand as much as possible.
- Lower the vehicle. Use the jack to lower the car until the spare tire touches the ground but the full weight is not yet on it.
- Tighten the lug nuts with a torque wrench. Tighten them in a star pattern to ensure even pressure. Refer to your owner’s manual for the correct torque specification.
- Lower the vehicle completely. Bring the jack all the way down and remove it.
- Check your tire pressure. Use your pressure gauge to make sure the spare is properly inflated.
- Stow your equipment. Put the flat tire, jack, and all tools back in your vehicle.
Common Mistakes People Make When Changing a Tire
Even with the right tools, mistakes can happen. Knowing what to avoid can save you time, money, and frustration. Here are the most common errors people make during a tire swap.
Skipping the Wheel Wedges
This is the number one mistake people make. They skip the wedges and start jacking up the vehicle. If the car rolls, it can cause serious injury or death. Always use wheel wedges, no matter how flat or stable the ground looks.
Not Tightening Lug Nuts Properly
Loose lug nuts are extremely dangerous. The wheel can come off while driving, causing a catastrophic accident. Always use a torque wrench to ensure proper tightness. And remember to tighten in a star pattern, not in a circle, to distribute the pressure evenly.
Driving Too Fast on a Compact Spare
Compact spares are designed for temporary use only. Driving at high speeds or for long distances on a donut can damage your vehicle and compromise your safety. Replace the spare with a full-size tire as soon as possible.
Forgetting to Check the Spare Tire Pressure
A flat spare tire defeats the entire purpose of having one. Many people forget to check their spare until they actually need it. Make it a habit to check your spare tire pressure every time you check your other tires.
Using the Wrong Jack Position
Every vehicle has specific jack points designed to support its weight safely. Using the wrong spot can cause the jack to slip or damage the vehicle’s frame. Always consult your owner’s manual before jacking up your car.
Building a Complete Roadside Emergency Kit
Beyond the core tire changing tools, a well-stocked roadside emergency kit can make a huge difference if you find yourself stranded. Here are some additional items to consider keeping in your vehicle at all times.
- A first aid kit for minor injuries
- A blanket for warmth in cold weather
- Water bottles to stay hydrated
- A phone charger or portable battery pack
- A reflective vest for visibility
- A basic tool set with pliers and screwdrivers
- Non-perishable snacks for long waits
Keeping these items in your trunk takes up minimal space. But they can make a roadside emergency much more manageable and comfortable. Being prepared is the best defense against unexpected situations on the road.
How to Maintain Your Tire Changing Tools
Your tools need regular maintenance to work when you need them most. A jack that does not hold pressure or a lug wrench with a stripped head is useless in an emergency. Here is how to keep your vehicle maintenance tools in top shape.
- Check your jack for leaks or damage every few months. A hydraulic jack should hold its position without sinking.
- Inspect your lug wrench for signs of wear or damage. Replace it if the handle is bent or the head is stripped.
- Test your spare tire pressure monthly. Add air as needed to maintain the recommended PSI.
- Keep your flashlight working by replacing batteries regularly or charging rechargeable ones.
- Store tools properly so they do not rattle around and get damaged in the trunk.
- Check your air compressor if you keep one in the vehicle. Make sure it holds charge and the hose is intact.
Taking a few minutes every few months to check your tools can save you from a frustrating and potentially dangerous situation. A little prevention goes a long way when it comes to roadside repair readiness.
When to Call for Professional Help
There is no shame in calling for help when you need it. If you do not feel comfortable changing a tire, if you are in an unsafe location, or if your tools are not working properly, it is perfectly fine to call roadside assistance. Professional help is always a valid option.
However, knowing how to change a tire yourself gives you options. You do not have to wait for help. You do not have to pay for a roadside service call. And you do not have to be stranded on the side of the road for an hour or more. Having the right tire changing tools and knowledge puts you in control of the situation.
Final Thoughts
Changing a tire is a fundamental skill that every driver should know. And having the right tools to change a tire makes the process safer, faster, and much less stressful. From a hydraulic jack and lug wrench to wheel wedges, a flashlight, and a torque wrench, each tool plays a vital role in getting the job done right.
Take the time to assemble your tire changing kit. Check it regularly. Practice using the tools so you are familiar with them before an emergency strikes. A little preparation today can save you a lot of hassle tomorrow. The next time you hear that telltale thump, you will be ready.
Stay safe on the road. Keep your tools in good shape. And remember, changing a tire is something you can absolutely do yourself with the right equipment and a little confidence.
Frequently Asked Questions
What are the basic tools needed to change a tire?
The basic tools include a car jack, a lug wrench, a spare tire, wheel wedges, a flashlight, and gloves. These are the essentials that most vehicles come with in the trunk. Having all of these items ensures you can handle a flat tire safely and efficiently.
Do I need an air compressor for tire changing?
An air compressor is not strictly necessary for changing a tire, but it is very helpful for reinflating your spare or repaired tire afterward. If you want to be fully prepared for roadside emergencies, a portable air compressor is a great addition to your kit.
How often should I check my spare tire pressure?
You should check your spare tire pressure at least once a month. Spare tires lose air over time, and a flat spare is useless when you actually need it. Make it part of your regular vehicle maintenance routine.
Can I use any jack to change a tire?
No, you should always use a jack rated for your vehicle’s weight and place it at the correct jack points. Using the wrong jack or placing it incorrectly can cause the vehicle to slip or fall, leading to serious injury or damage.
What is the correct way to tighten lug nuts?
Tighten lug nuts in a star pattern using a torque wrench. This ensures even pressure distribution and prevents warping the brake rotor. Always refer to your owner’s manual for the correct torque specification for your vehicle.
How long can I drive on a compact spare tire?
You should not drive more than 50 to 70 miles on a compact spare tire, and you should not exceed 50 miles per hour. Compact spares are temporary solutions designed to get you to a repair shop safely.