How to Uninstall VMware Tools on Windows 10 or 11 Now
Uninstalling VMware Tools from Windows 10 or 11 is straightforward when you follow the right steps. Whether you need to remove VMware Tools for a clean virtual machine setup or are troubleshooting driver issues, this guide walks you through every method. You will learn multiple uninstall approaches, troubleshoot common problems, and understand what to do after removal.
If you have been using a virtual machine and now need to remove VMware Tools, you are in the right place. This guide will show you exactly how to uninstall VMware Tools on Windows 10 or 11 without any hassle. Whether you are cleaning up a VM for a fresh install, switching to a different virtualization platform, or just troubleshooting driver conflicts, the steps here will help you get it done right.
VMware Tools is a suite of drivers and utilities that improves the performance and usability of a virtual machine. It enhances graphics, enables drag-and-drop file sharing, and provides better mouse integration. But sometimes, you need to remove it. Maybe you are migrating to a different platform, or perhaps the tools are causing conflicts with your system. Whatever the reason, knowing how to properly uninstall them is essential.
In this article, we will cover every method you can use. We will also address common problems that pop up during the process and explain what to do once the tools are removed. By the end, you will feel confident handling this task on your own.
Key Takeaways
- Multiple Methods Available: You can uninstall VMware Tools through Control Panel, the VMware menu, or Command Prompt.
- Safe and Reversible: Removing VMware Tools does not damage your virtual machine or host system.
- Windows 10 and 11 Share Similar Steps: The process is nearly identical on both operating systems.
- Clean Removal Matters: Properly uninstalling ensures no leftover drivers or services cause conflicts.
- Reinstallation Is Easy: You can always reinstall VMware Tools later if needed.
📑 Table of Contents
- What Is VMware Tools and Why Remove It?
- Prerequisites Before You Begin
- How to Uninstall VMware Tools on Windows 10
- How to Uninstall VMware Tools on Windows 11
- Troubleshooting Common Uninstall Issues
- What to Do After Uninstalling VMware Tools
- When Should You Reinstall VMware Tools?
- Comparison of Uninstall Methods
- Final Thoughts
What Is VMware Tools and Why Remove It?
VMware Tools is a package of software that VMware installs inside guest operating systems. It includes device drivers, system services, and user applications designed to make virtual machines work better. Without it, your VM may run slower and lack features like copy-paste between the host and guest.
So why would anyone want to remove it? Here are a few common reasons:
- Switching Virtualization Platforms: If you are moving from VMware to VirtualBox or Hyper-V, keeping VMware Tools can cause driver conflicts.
- Troubleshooting Issues: Sometimes VMware Tools drivers cause blue screens, slow performance, or device manager errors.
- Clean Installation: You may want a fresh start with no extra software bundled inside the VM.
- Compliance or Security: Some environments require minimal software installations to reduce attack surfaces.
- Resource Management: Removing unnecessary tools frees up system resources on the virtual machine.
No matter your reason, the uninstall process is safe. You will not harm your virtual machine or the physical host it runs on. Just follow the steps in order and you will be fine.
Prerequisites Before You Begin
Before you start uninstalling VMware Tools, there are a few things you should prepare. Taking a few minutes to get ready will save you time and prevent problems later.
Make Sure You Have Administrator Access
You need administrator privileges on the Windows 10 or 11 virtual machine to uninstall software properly. If you are logged in as a standard user, you will not be able to complete the removal. Switch to an admin account before proceeding.
Back Up Your Virtual Machine
Even though uninstalling VMware Tools is safe, it is always smart to take a backup first. Create a snapshot of your virtual machine or back up the VM files. This way, if anything unexpected happens, you can restore everything quickly.
Close All Running Applications
Before starting the uninstall, close any programs that are running inside the VM. This includes web browsers, office apps, and any background services. Closing everything ensures a smooth and uninterrupted uninstall process.
Check Your Power Source
If your virtual machine is running on a physical host that relies on backup power, make sure your power setup is stable. If you use a home lab with a backup generator, you may want to learn how to make a generator quiet so your workspace stays comfortable during long VM sessions. A stable power environment helps prevent any interruptions during the uninstall.
How to Uninstall VMware Tools on Windows 10
Windows 10 makes it relatively easy to remove VMware Tools. You have a few different methods to choose from. Pick the one that feels most comfortable for you.
Method 1: Uninstall Through Control Panel
This is the most common and straightforward method. Here is what to do:
- Log in to your Windows 10 virtual machine with administrator rights.
- Click the Start menu and open the Control Panel.
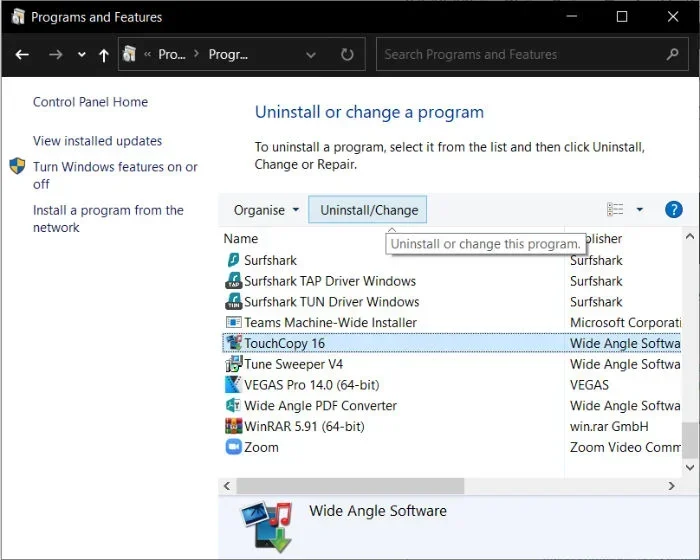
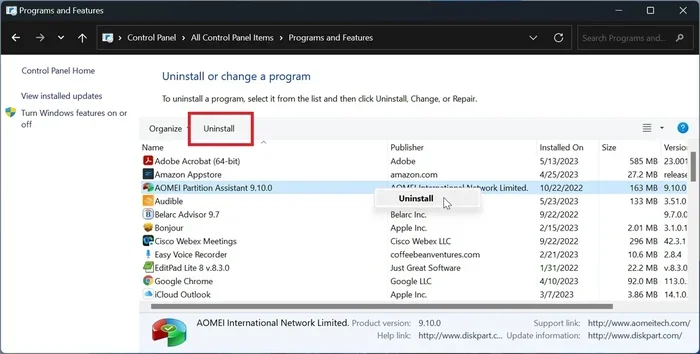
- Navigate to Programs and then click Programs and Features.
- Scroll through the list of installed programs until you find VMware Tools.
- Click on VMware Tools and then click the Uninstall button at the top.
- Follow the on-screen prompts to complete the removal.
- Restart the virtual machine when prompted.
That is it. The uninstall wizard will handle most of the work for you. It removes the core VMware Tools components and the device drivers. Once the VM restarts, VMware Tools will no longer be active.
Method 2: Use the VMware Menu Inside the VM
If you are using VMware Workstation or VMware Player, you can also uninstall through the application menu:
- Open your virtual machine in VMware Workstation.
- Click on the VM menu at the top of the VMware window.
- Select Install VMware Tools (this option changes to Reinstall or Remove depending on your version).
- Follow the prompts inside the guest operating system to complete the removal.
This method is convenient because it does not require you to open the Control Panel. It works well if you are already working inside the VMware interface.
Method 3: Use Command Prompt for a Silent Uninstall
If you prefer a more technical approach or need to uninstall VMware Tools remotely, you can use the Command Prompt:
- Open Command Prompt as an administrator inside the VM.
- Navigate to the VMware Tools installation directory, typically C:\Program Files\VMware\VMware Tools.
- Run the uninstaller executable with the appropriate switches for a silent install.
- Wait for the process to complete and then restart the VM.
This method is useful for advanced users or IT administrators managing multiple virtual machines. It allows for scripted and automated removal across many systems at once.
How to Uninstall VMware Tools on Windows 11
The process for Windows 11 is very similar to Windows 10. Microsoft has not changed the core uninstall mechanics, so the same methods apply. Here is a quick walkthrough for the most popular approach.
Uninstall via Settings App
Windows 11 has a redesigned Settings app that makes software removal even simpler:
- Open the Settings app by pressing Windows Key + I.
- Click on Apps in the left sidebar.
- Select Installed Apps from the right panel.
- Search for VMware Tools in the search bar.
- Click the three dots next to VMware Tools and select Uninstall.
- Confirm the action and wait for the process to finish.
- Restart your virtual machine after the uninstall completes.
The Settings app method is cleaner and more modern than the old Control Panel approach. Microsoft has been pushing users toward this interface, and it works well for removing VMware Tools too.
Uninstall via Add or Remove Programs
If you prefer the classic approach, you can also use the Add or Remove Programs section in Windows 11:
- Open Settings and go to Apps.
- Click on Advanced App Settings or scroll down to find Add or Remove Programs.
- Locate VMware Tools in the list.
- Click Remove and follow the on-screen instructions.
Both methods achieve the same result. Choose whichever feels more natural to you.
Troubleshooting Common Uninstall Issues
Sometimes things do not go smoothly. Here are the most common problems people run into when trying to remove VMware Tools and how to fix them.
VMware Tools Does Not Show in the Uninstall List
If you cannot find VMware Tools in Programs and Features, try these steps:
- Check if VMware Tools is running in the system tray. Right-click the icon and look for an uninstall option.
- Open File Explorer and navigate to the VMware Tools folder. Run the uninstaller directly from there.
- Use the Command Prompt method described above to force the removal.
Uninstall Gets Stuck or Freezes
This can happen if another process is using a VMware Tools file. Try closing all applications first. If that does not work, restart the VM into Safe Mode and run the uninstall again. Safe Mode loads only essential drivers, which reduces the chance of file locks.
Error Messages During Uninstall
If you see error codes or messages, note them down. Common errors include access denied or file in use. Running the uninstaller as an administrator usually fixes the access denied issue. For file-in-use errors, a reboot into Safe Mode is your best bet.
Leftover Files After Uninstall
Sometimes VMware Tools leaves behind files even after uninstallation. To clean these up manually:
- Delete the C:\Program Files\VMware\VMware Tools folder if it still exists.
- Check C:\ProgramData\VMware for any remaining VMware folders.
- Open Device Manager and look for any VMware devices with yellow warning icons. Right-click and uninstall those drivers too.
Taking the time to clean up leftover files ensures a truly complete removal. This is especially important if you plan to install a different virtualization platform on the same VM.
What to Do After Uninstalling VMware Tools
Once VMware Tools is removed, there are a few things you should do to make sure everything works properly.
Verify the Removal
After the VM restarts, check that VMware Tools is no longer running. Look in the system tray for the VMware Tools icon. It should be gone. You can also open Device Manager and confirm that VMware drivers are no longer listed.
Test Your Virtual Machine Performance
Without VMware Tools, your VM will rely on generic drivers. This means graphics may be less smooth and mouse integration might not work as well. These limitations are normal and expected. If you are switching to a different platform, install the equivalent tools for that platform.
Consider Installing Alternative Tools
If you removed VMware Tools because you are moving to a different virtualization platform, now is the time to install the replacement tools. For example, if you are switching to VirtualBox, install VirtualBox Guest Additions. If you are moving to Hyper-V, install the Hyper-V Integration Services.
Keep Your Host System Stable
If your physical host machine runs on backup power, maintaining a reliable power setup is important for both the host and its virtual machines. If you have a generator at your home or office, understanding how it works can help you keep everything running smoothly. Check out how does a generator work to learn the basics of generator operation and keep your lab powered reliably.
When Should You Reinstall VMware Tools?
Removing VMware Tools does not mean you can never use them again. There are many situations where reinstalling makes sense. If you decide to go back to VMware as your primary virtualization platform, you will want to reinstall the tools for the best performance and feature set.
You should also reinstall VMware Tools if you notice that your VM is running slowly without them. The tools include optimized drivers that significantly improve graphics, network, and storage performance. Many users find that a VM without VMware Tools feels sluggish compared to one with the tools installed.
To reinstall, simply open VMware Workstation, select your VM, go to the VM menu, and click Install VMware Tools. The installer will guide you through the setup process inside the guest operating system.
Comparison of Uninstall Methods
| Method | Best For | Difficulty Level | Time Required |
|---|---|---|---|
| Control Panel Uninstall | Most users, straightforward removal | Easy | 5-10 minutes |
| VMware Menu Uninstall | Users already in VMware Workstation | Easy | 5-10 minutes |
| Command Prompt Uninstall | Advanced users, batch removal | Medium | 10-15 minutes |
| Settings App (Windows 11) | Windows 11 users wanting a modern approach | Easy | 5-10 minutes |
All four methods produce the same result. The choice depends on your comfort level and the situation. For most people, the Control Panel or Settings app method is the easiest starting point.
Final Thoughts
Uninstalling VMware Tools from Windows 10 or 11 does not have to be complicated. You now have multiple methods to choose from, and you know how to handle common issues if they come up. Whether you are cleaning up a VM, switching platforms, or just troubleshooting, you have everything you need to get the job done.
Remember to back up your virtual machine before making any changes. Take your time with the uninstall process, and do not rush through the steps. If you run into problems, refer back to the troubleshooting section for help.
With VMware Tools removed, your virtual machine is ready for whatever comes next. Whether that is a fresh operating system install, a platform migration, or just a cleaner setup, you are all set. The process is reversible too, so you can always reinstall VMware Tools later if you change your mind.
Now that you know how to handle this task, you can manage your virtual machines with more confidence. Happy computing!
Frequently Asked Questions
Is it safe to uninstall VMware Tools from a Windows 10 or 11 virtual machine?
Yes, it is completely safe. Uninstalling VMware Tools does not damage your virtual machine or the physical host. You may lose some features like copy-paste and mouse integration, but everything will continue to work normally with generic drivers.
Can I reinstall VMware Tools after uninstalling it?
Absolutely. You can reinstall VMware Tools at any time by going to the VM menu in VMware Workstation and selecting Install VMware Tools. The process is quick and straightforward, and you will get all the features back.
What happens if I do not uninstall VMware Tools properly?
If you skip the proper uninstall process, leftover drivers and services may remain on the system. This can cause conflicts if you install a different virtualization platform later. Always use the official uninstall methods to ensure a clean removal.
Do I need to restart my virtual machine after uninstalling VMware Tools?
Yes, restarting is recommended. The restart allows Windows to fully remove the VMware Tools services and drivers. It also ensures that any changes take effect properly before you start using the VM again.
Can I uninstall VMware Tools from a remote virtual machine?
Yes, you can use the Command Prompt method or remote desktop tools to uninstall VMware Tools from a remote VM. The process is the same, but you will need administrator access to the remote machine to complete the uninstall.
Will uninstalling VMware Tools improve my VM’s performance?
It depends on your use case. VMware Tools includes optimized drivers that improve performance in many scenarios. However, if the tools are causing conflicts or consuming unnecessary resources, removing them can actually improve performance and stability.
=== CONCLUSION ===
You now know exactly how to uninstall VMware Tools on Windows 10 or 11. From the Control Panel method to the Settings app approach and even the Command Prompt option, you have multiple paths to a clean removal. The key is to follow the steps carefully, back up your VM first, and handle any issues that come up with the troubleshooting tips provided.
Remember that removing VMware Tools is a reversible process. You can always reinstall them later if your needs change. This flexibility gives you full control over your virtual machine environment. Take what you learned here, apply it to your setup, and enjoy a cleaner, more streamlined virtual machine experience.