How to Remove Rust from Metal Tools with Simple Methods
Removing rust from metal tools is easier than most people think. You can use simple household items like vinegar, baking soda, and WD-40 to bring rusted tools back to life. This guide covers five proven DIY rust removal methods that work on surface rust and deep rust alike. You will also learn how to prevent corrosion and keep your hand tools in top shape for years.
There is nothing more frustrating than reaching for a favorite hand tool only to find it covered in rust. Whether it is a wrench, a screwdriver, or a pair of pliers, rusted tools can ruin your workflow and even become unsafe to use. The good news is that how to remove rust from metal tools does not require expensive chemicals or professional help. You likely already have everything you need right in your kitchen or garage.
In this guide, we will walk you through the best DIY rust removal methods that actually work. We will cover simple household solutions like vinegar and baking soda, as well as more advanced techniques like electrolysis. You will also learn how to prevent rust from forming again and how to decide when a tool is beyond saving. By the end, you will feel confident tackling rust removal on any metal tool in your collection.
Let us face it. Tools are an investment. Whether you are a weekend DIYer or a professional tradesperson, your tools matter. Keeping them clean and rust-free saves you money and keeps your projects running smoothly. So let us dive into the simplest and most effective ways to bring your rusted tools back to life.
Key Takeaways
- Vinegar and baking soda are the most accessible DIY rust removal solutions for everyday metal tools.
- WD-40 and protective coatings help prevent rust from coming back after cleaning.
- Electrolysis is the best method for removing deep rust from heavily corroded tools.
- Regular tool maintenance and proper storage are the keys to long-term rust prevention.
- Not every rusted tool is worth saving. Know when to restore and when to replace.
- Avoid common mistakes like using harsh abrasives on delicate tool surfaces.
📑 Table of Contents
Why Metal Tools Get Rusty
Before we get into the how-to, it helps to understand why rust happens in the first place. Rust is not just dirt. It is a chemical reaction. When iron or steel tools are exposed to moisture and oxygen over time, they form iron oxide. That is the reddish-brown flaky substance we call rust. The more moisture your tools encounter, the faster corrosion removal becomes necessary.
The Science Behind Rust Formation
Rust forms through a process called oxidation. When water molecules touch the metal surface, they break down the iron atoms. This reaction is accelerated by salt, acid, and humidity. Even touching tools with bare, sweaty hands can introduce enough moisture to start the process. That is why tool maintenance is so important. The faster you address surface rust, the easier it is to treat.
Common Causes of Tool Rust
Several everyday habits lead to rust on rusted tools. Storing tools in damp areas like basements or garages without climate control is a major culprit. Leaving tools outside after use is another big one. Even residual moisture from cleaning can cause rust if tools are not dried properly. Here are the most common causes:
- Storing tools in humid or damp environments without proper ventilation.
- Leaving tools dirty after use, especially with soil or sweat on them.
- Not drying tools thoroughly after washing or cleaning.
- Using tools in wet conditions without cleaning them afterward.
- Lack of protective coatings like oil or rust-proof sprays.
Understanding these causes helps you fight rust at the source. Prevention is always easier than corrosion removal.
Best DIY Methods to Remove Rust from Metal Tools
Now for the fun part. There are many ways to tackle rust removal, and you do not need a fancy workshop. Below are five proven methods you can try at home. Each one works on different levels of rust, so you can pick the one that fits your situation best.
Method 1: The Vinegar Soak
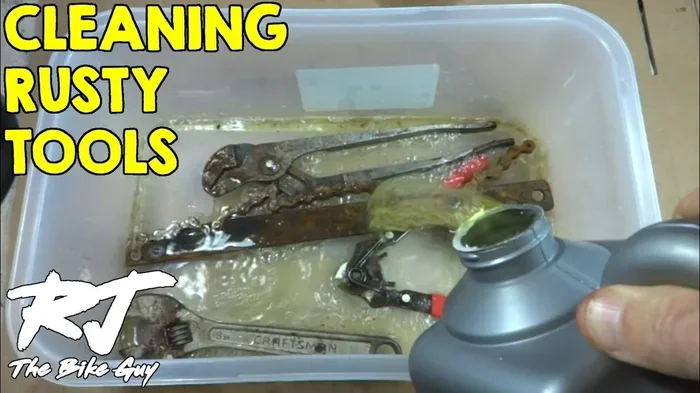
White vinegar is one of the most popular DIY rust removal solutions, and for good reason. The acetic acid in vinegar dissolves rust gently and effectively. This method works best for surface rust and light deep rust on hand tools.
Here is how to do it:
- Fill a container with enough white vinegar to fully submerge the rusted tool.
- Place the tool in the vinegar and let it soak for 12 to 24 hours.
- Remove the tool and scrub the rust away using steel wool or a stiff brush.
- Rinse the tool with clean water and dry it completely with a towel.
- Apply a thin layer of oil to protect the clean metal surface.
For stubborn rust, you can add salt to the vinegar to boost the acid reaction. This creates a stronger rust dissolver effect. Just make sure you rinse the tool well afterward. The vinegar soak is gentle enough to use regularly and is one of the safest methods for tool restoration.
Method 2: Baking Soda Paste
If you do not want to use vinegar, baking soda is another excellent option for rust removal. Baking soda works as a mild abrasive that scrubs away rust without damaging the underlying metal. It is perfect for tools with light to moderate rust.
Follow these steps for the best results:
- Mix three parts baking soda with one part water to form a thick paste.
- Spread the paste evenly over the rusted areas of the tool.
- Let it sit for at least one hour. For heavy rust, leave it overnight.
- Scrub the paste away using steel wool or a toothbrush.
- Rinse with warm water and dry the tool completely.
You can also make a baking soda paste with a bit of lemon juice for extra cleaning power. The citric acid in lemon juice adds a natural rust-fighting boost. This method is safe for most tool finishes and does not produce harsh fumes.
Method 3: WD-40 and Oil Treatment
WD-40 is a household name for a reason. It penetrates rust and loosens the bond between the rust and the metal surface. This makes it one of the easiest options for how to remove rust from metal tools without much scrubbing. It also serves double duty as a protective coating after cleaning.
To use WD-40 for rust removal:
- Spray a generous amount of WD-40 directly onto the rusted areas.
- Let it sit for 10 to 15 minutes to penetrate the rust.
- Scrub the area with steel wool or a wire brush.
- Wipe away the loosened rust and excess WD-40.
- Apply a light coat of mineral oil or tool oil to protect the surface.
WD-40 works well on surface rust and light deep rust. For heavier rust, you may need to repeat the process a few times. Many professionals keep WD-40 in their toolbox for both rust removal and ongoing tool maintenance.
Method 4: Electrolysis for Deep Rust
If you have a heavily rusted tool that other methods cannot touch, electrolysis is the answer. This is a more advanced DIY rust removal technique, but it is incredibly effective. Electrolysis uses an electrical current to break down rust chemically without harming the base metal.
Here is what you need and how to do it:
- A plastic container filled with water and washing soda (sodium carbonate).
- A piece of sacrificial steel (like an old wrench or steel rod).
- A battery charger set to low voltage (12 volts works well).
- Lug nuts or clamps to connect the cables.
Connect the positive cable to the sacrificial steel and the negative cable to your rusted tool. Submerge both in the solution and turn on the charger. Let it run for 4 to 12 hours depending on the rust severity. The rust will migrate from your tool to the sacrificial steel. This method is perfect for tool restoration of valuable or sentimental pieces. It is also one of the safest ways to handle deep rust because it does not remove any base metal.
Method 5: Commercial Rust Dissolvers
If you prefer a ready-made solution, commercial rust dissolver products are widely available at hardware stores. Products like Evapo-Rust and Ospho are designed specifically for corrosion removal on metal tools. They work faster than household methods and are formulated to be safe on most tool surfaces.
When using commercial rust removers, always follow the manufacturer instructions. Most products require soaking or brushing and then rinsing. These solutions are a great option when you need quick results and do not want to wait for a vinegar soak or electrolysis setup. They are especially useful for tool maintenance on professional-grade equipment.
How to Prevent Rust on Your Metal Tools
Once you have cleaned your tools, the next step is making sure rust does not come back. Rust prevention is just as important as rust removal. A little effort after each use can save you hours of cleaning down the road.
Storage Tips for Rust-Free Tools
How you store your tools has a huge impact on their lifespan. Moisture is the number one enemy of metal tools. Here are some storage tips that make a real difference:
- Store tools in a dry, climate-controlled area away from damp walls and floors.
- Use a tool chest or cabinet with a dehumidifier if your garage tends to be humid.
- Hang tools on a wall rack rather than throwing them in a damp toolbox where moisture collects.
- Place silica gel packets or rust-proofing strips inside your tool storage area.
- Never leave tools outside overnight, even if they are covered.
Proper storage is one of the simplest and most effective rust prevention strategies. It costs almost nothing and pays off enormously over time.
Protective Coatings and Oils
Applying a protective coating to your tools after cleaning creates a barrier against moisture and oxygen. There are several options to choose from:
- Camellia oil is a traditional choice for hand tools. It dries to a thin protective film.
- Mineral oil is affordable and works well on most metal surfaces.
- Beeswax-based protectants provide a durable barrier and give tools a nice shine.
- Spray-on rust inhibitors are quick and easy to apply after each use.
- A light coat of WD-40 works as both a protectant and a lubricant.
Apply your chosen protective coating after every cleaning session. This habit alone can dramatically extend the life of your hand tools and reduce the need for future rust removal.
Regular Maintenance Routine
Consistency is the key to keeping tools rust-free. A simple maintenance routine takes only a few minutes after each use. Here is a quick checklist you can follow:
- Clean tools after every use. Wipe off dirt, moisture, and debris with a dry cloth.
- Apply a light coat of oil to metal surfaces before storing.
- Inspect tools regularly for any signs of surface rust or discoloration.
- Address rust immediately when you spot it. Early corrosion removal is much easier than tackling heavy buildup.
- Sharpen and condition cutting tools like blades and chisels to prevent moisture traps.
Just like knowing how to drain Craftsman air compressor keeps your compressor in good shape, regular tool care prevents buildup and extends the life of your equipment. Think of it as a small daily habit that protects a big investment.
When to Restore vs. Replace Rusted Tools
Not every rusted tool deserves a second chance. Sometimes the best move is to let go and replace it. Knowing the difference between a tool worth saving and one that is beyond help is an important part of tool maintenance.
Signs Your Tool Is Beyond Saving
Some tools are too far gone for DIY rust removal to make a difference. Here are signs that a tool should be replaced rather than restored:
- Deep pitting or holes in the metal that compromise structural integrity.
- Cracked or broken handles that cannot be safely repaired.
- Rust that has eaten through critical moving parts like pivot points or hinges.
- Tools that are very cheap and widely available where the cost of restoration exceeds the cost of a new one.
If a tool has been rusted for years and the metal has become brittle, it is not safe to use no matter how much corrosion removal you perform. In these cases, recycling or properly disposing of the old tool is the right call. You can find guidance on handling old equipment, similar to what to do with old air compressor, to make sure you handle disposal responsibly.
Cost Comparison: Restore or Buy New
Sometimes the math does not work out in favor of restoration. Here is a simple way to think about it:
- Cost of DIY rust removal supplies (vinegar, baking soda, WD-40) is typically under $15.
- Cost of a new basic hand tool ranges from $10 to $50 depending on the type.
- Cost of professional restoration for a specialty or antique tool can run $50 to $200 or more.
If a common tool costs less to replace than to restore, go with the new one. Save your restoration efforts for quality tools with sentimental or professional value. This approach keeps your tool collection practical and cost-effective.
Expert Tips for Long-Lasting Tool Care
Beyond the basics, there are some pro-level habits that make a real difference in keeping your tools rust-free. These tips come from experienced tradespeople and tool collectors who have spent years perfecting their tool maintenance routines.
Quick Daily Habits
Small habits done consistently beat big efforts done rarely. Try adding these to your daily routine:
- Wipe down tools with an oily rag after every use. This takes just 30 seconds.
- Keep a dedicated drying towel in your workspace for freshly cleaned tools.
- Store tools with the metal parts slightly oiled even during short-term storage.
- Use gloves when handling tools to prevent sweat and moisture transfer.
These tiny habits add up over months and years. They are the secret behind why some tool collections look brand new after decades while others deteriorate quickly.
Seasonal Maintenance Checklist
A deeper maintenance session every season keeps your tools in top condition. Here is a checklist you can follow quarterly:
- Inspect all tools for any signs of rust or corrosion.
- Clean any rust spots immediately using your preferred DIY rust removal method.
- Reapply protective coatings and oils to all metal surfaces.
- Check tool handles for cracks or damage and sand or replace as needed.
- Organize and reorganize your tool storage to ensure proper airflow and dryness.
- Sharpen cutting tools and check for any wear that could trap moisture.
Following this checklist means you rarely have to deal with heavy rust removal. And just as knowing how to use Porter Cable air compressor properly extends its lifespan, understanding your tools and caring for them consistently prevents most rust problems before they start.
Common Mistakes When Removing Rust
Even with the best intentions, people make mistakes during rust removal that can damage their tools or make the problem worse. Here are the most common errors to avoid.
What Not to Do
- Do not use steel wool on polished or chrome surfaces. It will leave scratches that trap moisture and make rust worse.
- Do not leave tools wet after cleaning. Always dry them completely before storing or applying oil.
- Do not use bleach to remove rust. Bleach actually accelerates corrosion and can damage the metal further.
- Do so not soak tools with wooden handles in liquid. Moisture will swell and crack the wood.
- Do not ignore early rust spots. Small surface rust is much easier to treat than heavy deep rust.
Avoiding these mistakes saves you time and protects your tools. When in doubt, always err on the side of gentleness. You can always repeat a mild treatment, but you cannot undo damage from harsh methods.
Final Thoughts
How to remove rust from metal tools does not have to be complicated or expensive. With the right methods and a little patience, you can restore almost any rusted tool to working condition. Whether you choose a simple vinegar soak, a baking soda scrub, or a more advanced electrolysis setup, the key is to act quickly and consistently.
Remember that rust prevention is just as important as rust removal. A little oil, proper storage, and regular cleaning will keep your hand tools in excellent shape for years. And when a tool is truly beyond saving, do not be afraid to replace it and start fresh.
Start with the method that fits your situation best. Try the vinegar soak on a lightly rusted wrench today and see the results for yourself. Once you experience the satisfaction of bringing a rusted tool back to life, you will never let rust take over your collection again.
Frequently Asked Questions
What is the fastest way to remove rust from metal tools?
WD-40 and a wire brush work the fastest for most surface rust on metal tools. Spray the WD-40, let it sit for 10 to 15 minutes, then scrub with steel wool. For heavier rust, a vinegar soak overnight is the next fastest option. Both methods are quick, affordable, and easy to do at home.
Can you use vinegar and baking soda together to remove rust?
Yes, you can combine vinegar and baking soda for a powerful DIY rust removal solution. The vinegar dissolves the rust while the baking soda provides gentle abrasion. Apply the vinegar first, let it soak for 30 minutes, then sprinkle baking soda and scrub with steel wool. This combination works well on moderate rust on hand tools.
Is electrolysis safe for all metal tools?
Electrolysis is safe for most steel and iron tools but should not be used on tools with chrome plating or delicate finishes. The electrical current can damage chrome coatings and non-ferrous metals like aluminum or copper. Stick to electrolysis for plain carbon steel and cast iron tools only.
How often should I oil my tools to prevent rust?
You should oil your tools after every use and before long-term storage. A quick wipe-down with an oily cloth takes just a few seconds and creates a protective barrier against moisture. For tools used frequently, a light oiling once a week during active use is a good routine to follow.
What household items can I use for rust removal?
Several household items work great for rust removal on metal tools. White vinegar, baking soda, lemon juice, salt, and WD-40 are all effective and readily available. You can also use cola drinks in a pinch, as the phosphoric acid helps dissolve rust. These items make corrosion removal easy without buying specialized products.
How do I know if a rusted tool can be saved?
A rusted tool can usually be saved if the metal is still solid and the rust is on the surface only. If the tool has deep pitting, cracks, or structural damage, it may be beyond repair. Check for flexibility in the metal and make sure any moving parts still function. When in doubt, try a mild rust removal method first and assess the results before deciding to replace the tool.