How to Remove Rust from Tools Fast Using Simple Tricks
Learn how to remove rust from tools fast with these simple tricks that bring your gear back to life in minutes. Whether you’re battling surface rust or heavy corrosion, you’ll discover quick, chemical-free methods using items already in your kitchen. No expensive equipment needed—just easy steps that save time and keep your tools working like new.
Key Takeaways
- White vinegar soaks remove light rust in as little as one to two hours.
- Baking soda paste works best on surface rust without damaging the tool’s finish.
- Always dry tools completely after cleaning to prevent rust from returning quickly.
- WD-40 or mineral oil creates a protective barrier against future moisture and rust.
- Sandpaper or steel wool tackles heavy rust but requires careful, even pressure.
- Store tools properly in a dry, oiled environment to avoid recurring rust buildup.
- Lemon juice and salt offers a natural alternative for mild rust removal.
📑 Table of Contents
- Why Tools Rust and How to Spot the Damage Early
- Household Solutions That Dissolve Rust Fast
- Commercial Rust Removers That Actually Work
- Step-by-Step Process to Remove Rust from Tools Fast
- Preventing Rust on Your Tools for the Long Run
- When Restoration Is Not Worth It
- Quick Comparison of Rust Removal Methods
Why Tools Rust and How to Spot the Damage Early
There is nothing more frustrating than grabbing your favorite hand tools only to find them covered in orange-brown rust. Whether you are a weekend DIYer or a professional tradesperson, dealing with rusted tools is something everyone faces at some point. Rust doesn’t just make your tools look bad. It weakens the metal, reduces cutting efficiency, and can even make a tool unsafe to use.
Rust removal is not as hard as most people think. In many cases, you can bring even badly corroded tools back to life using items you already have in your kitchen or garage. The key is knowing what causes rust and catching it before it eats through your metal for good.
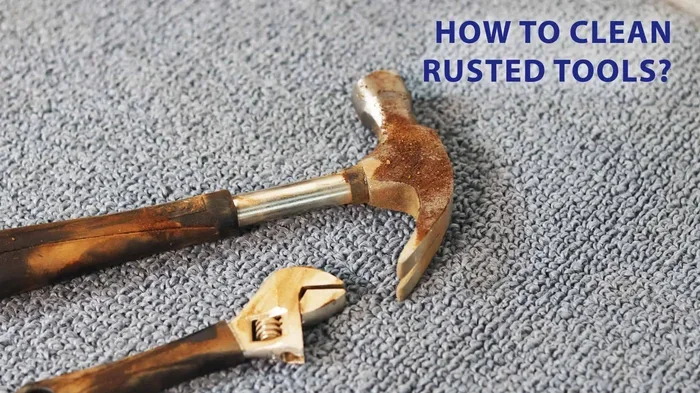
Rust forms when iron or steel reacts with oxygen and moisture. This process is called oxidation, and it happens faster in humid environments. Tools left in damp sheds, garages without climate control, or even in a pile of wet grass are prime targets. The good news is that tool maintenance and regular care can slow this process significantly. Understanding the early signs of surface rust gives you a huge advantage. A light orange discoloration means the damage is still shallow and much easier to fix than deep pitting or flaking metal.
Household Solutions That Dissolve Rust Fast
Before you run out and buy expensive chemical products, try these simple household remedies. Many of them work surprisingly well and cost almost nothing. Here are the most effective kitchen and household items for rust dissolver treatments.
White Vinegar Soak Method
White vinegar is one of the most popular rust cleaners out there, and for good reason. The acetic acid in vinegar breaks down iron oxide, which is what rust actually is. To use this method, simply submerge your rusted tools in a container filled with undiluted white vinegar. Let them soak for anywhere from two to twelve hours depending on how bad the rust is.
After soaking, use a stiff brush or steel wool to scrub away the loosened rust. For surface rust that has only been sitting on the tool for a short time, a quick 30-minute soak often does the trick. This method works great on smaller tools like wrenches, pliers, screwdrivers, and chisels. Just make sure you dry the tools thoroughly after cleaning to prevent new rust from forming right away.
Baking Soda Paste Technique
Baking soda is another gentle but effective option for rust treatment. Mix three parts baking soda with one part water to create a thick paste. Spread this paste over the rusted areas and let it sit for at least an hour. The mild abrasive quality of baking soda helps lift rust without scratching the underlying metal too aggressively.
This method is especially good for tools with light to moderate rust. Use an old toothbrush or a soft cloth to work the paste into the affected areas. Rinse with warm water and dry completely. You can repeat this process several times if needed for stubborn spots. Baking soda is also safe to use on tools with paint or finish, so you do not have to worry about damaging the handle or coating.
Lemon Juice and Salt Scrub
If you want a slightly more aggressive approach, try combining lemon juice with coarse salt. The citric acid in lemon juice dissolves rust effectively, while the salt acts as a natural abrasive. Squeeze fresh lemon juice over the rusted area, sprinkle a generous amount of salt on top, and let the mixture sit for two to three hours.
After the waiting period, use the lemon rind or a scrub brush to work away the rust. This combination is particularly effective on rusted metal with medium-depth corrosion. It leaves behind a fresh citrus scent and works well on tools like garden shears, hedge trimmers, and outdoor hand tools that have been exposed to the elements.
Commercial Rust Removers That Actually Work
Sometimes household remedies are not enough, especially for heavy rust or tools with intricate details that are hard to reach. In those cases, a quality commercial rust remover can save you a lot of time and elbow grease. Here is a closer look at what works best.
Evapo-Rust and Similar Soak Products
Evapo-Rust is widely regarded as one of the best rust dissolver products on the market. It is a biodegradable, non-toxic solution that works through a process called chelation, which pulls the iron oxide away from the metal surface. You simply submerge your tools in the solution and wait. Unlike vinegar, Evapo-Rust can be reused multiple times, making it a cost-effective choice for regular tool restoration projects.
One of the biggest advantages of Evapo-Rust is that it does not strip paint, plating, or other protective coatings. This makes it ideal for tools that you want to clean without damaging the original finish. For heavily rusted steel tools that have been sitting in a damp garage for years, a overnight soak in Evapo-Rust can produce remarkable results.
WD-40 and Penetrating Oils for Rust
WD-40 is famous for its many uses, and rust removal is one of them. The formula penetrates rust and loosens the bond between the oxidized layer and the base metal. Spray it generously on the affected area, wait about ten minutes, and then scrub with a wire brush or abrasive pad. WD-40 also works as a short-term lubricant and moisture barrier, so it serves double duty for tool care.
Keep in mind that WD-40 is best for light to moderate rust. For deeply corroded tools, you may need a stronger product or a longer soak. Other penetrating oils like PB Blaster and Liquid Wrench also work well for rusted tools that need a little extra help breaking free from corrosion.
Step-by-Step Process to Remove Rust from Tools Fast
Now that you know what products to use, let me walk you through the complete process. Following a clear sequence ensures you get the best results without wasting time or damaging your tools further.
Step 1: Assess the Damage
Before you start, take a close look at each tool. Is the rust only on the surface, or has it eaten deep into the metal? Surface rust is relatively easy to deal with. Deep pitting and flaking require more aggressive treatment. This assessment helps you decide which method to use and how much time to invest.
Step 2: Choose Your Rust Removal Method
Match your chosen method to the severity of the rust. For light rust, start with vinegar or baking soda. For moderate rust, try the lemon and salt method or a commercial soak. For heavy rust, consider a commercial rust remover or mechanical methods like sanding or grinding.
Step 3: Apply and Wait
Apply your chosen rust cleaner and let it do the work. Do not rush this step. Soaking times vary depending on the product and the depth of the corrosion. Check periodically and reapply if needed. Patience is one of the most important factors in successful rust removal from tools.
Step 4: Scrub and Clean
Once the rust has softened or dissolved, scrub the tool with a wire brush, steel wool, or abrasive pad. Work in the direction of the metal grain to avoid creating scratches. For hard-to-reach areas, use an old toothbrush or a narrow wire brush. Rinse the tool with clean water and dry it immediately with a clean cloth.
Step 5: Protect and Store Properly
After cleaning, apply a thin coat of mineral oil, camellia oil, or a rust-preventive spray to protect the freshly cleaned metal. Proper tool maintenance includes storing tools in a dry place with good air circulation. Consider using a dehumidifier in your garage or shed if you live in a humid climate. Regularly wiping down tools after each use also goes a long way in preventing future rust buildup.
Preventing Rust on Your Tools for the Long Run
Cleaning rust off your tools is only half the battle. The real goal is to stop it from coming back. Tool maintenance habits make all the difference between tools that last decades and tools that need replacing every few years.
Start by drying your tools thoroughly after every use. Even a few drops of water left on a metal surface can start the oxidation process. Wipe down your tools with an oily rag after cleaning sessions. This creates a protective barrier against moisture in the air.
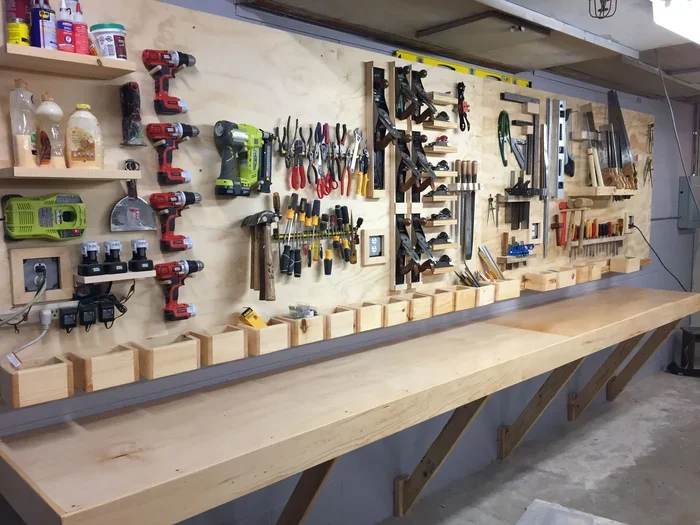
Proper storage is equally important. Keep your tools in a dry, climate-controlled area whenever possible. If you use an air compressor to clean dust and debris off your tools after a job, make sure you maintain it properly. Regularly drain the moisture tank on your compressor so it does not introduce additional humidity into your workspace. Storing tools in a wall organizer or a closed cabinet also reduces their exposure to humid air compared to leaving them out in the open.
For long-term storage, consider applying a light coat of beeswax or a dedicated tool protectant. Some tool owners swear by storing a few silica gel packets in their tool boxes to absorb excess moisture. If you have an older air compressor taking up space in your shop, think about what to do with it rather than letting it become a rust trap. You can find practical ideas for repurposing or safely disposing of old equipment to keep your workspace organized and dry.
Another often-overlooked tip is to check your tools regularly. A quick visual inspection once a month can catch surface rust before it turns into a serious problem. Early intervention means less work and better results when you do need to remove rust. The few minutes you spend wiping down your tools after each session pay off enormously over time.
When Restoration Is Not Worth It
Not every tool can or should be saved. Sometimes rust damage goes too deep, and the cost or effort of restoration simply does not make sense. Knowing when to let go is just as important as knowing how to clean your tools.
If a tool has deep pitting that affects its function, it is probably time to replace it. A wrench with a severely corroded jaw, for example, may not grip properly even after cleaning, which creates a safety hazard. Similarly, tools with extensive surface pitting on cutting edges may never cut as cleanly as they once did, no matter how much rust treatment you apply.
Consider the cost comparison as well. If a basic replacement tool costs less than the time and materials needed to restore an old one, replacement is usually the smarter choice. That said, sentimental or specialty tools are worth the extra effort. A favorite vintage hand plane or a quality brand-name tool from years ago often deserves the restoration treatment.
When you do decide to replace heavily rusted tools, take the opportunity to improve your storage and maintenance routine going forward. Investing in a small dehumidifier, quality tool oil, and proper storage solutions can protect your new tools and save you from going through the same rust removal process again next season.
Quick Comparison of Rust Removal Methods
Here is a quick look at how different rust removal methods compare in terms of effectiveness, cost, and ease of use.
| Method | Best For | Time Required | Cost | Effectiveness |
|---|---|---|---|---|
| White Vinegar Soak | Light to moderate surface rust | 2-12 hours | Very Low | Good |
| Baking Soda Paste | Light rust on painted tools | 1-2 hours | Very Low | Moderate |
| Lemon and Salt | Medium rust on outdoor tools | 2-3 hours | Low | Good |
| Evapo-Rust Soak | Moderate to heavy rust | 1-24 hours | Moderate | Excellent |
| WD-40 Spray | Light rust and quick touch-ups | 10-30 minutes | Low | Moderate |
| Mechanical Sanding | Heavy rust on durable tools | 30-60 minutes | Moderate | Excellent |
As you can see from the table above, the best method depends on the severity of the rust and the type of tool you are working with. For most homeowners, starting with a vinegar soak or baking soda paste covers the majority of rust removal needs. Commercial products like Evapo-Rust are worth the investment if you regularly deal with badly corroded tools or if you want a reusable solution that handles heavy rust with minimal effort.
The most important thing to remember is that how to remove rust from tools fast comes down to choosing the right method for the job and following through with proper cleaning and protection afterward. Whether you use a simple vinegar soak or a professional-grade rust cleaner, the key is to act quickly when you first notice rust and to establish a regular tool maintenance routine that keeps your tools in top condition for years to come.
Frequently Asked Questions
How to Remove Rust from Tools Fast at Home?
The fastest way is to soak your tools in white vinegar or a citric acid solution for a few hours. For lighter rust, rubbing with a wire brush or using a baking soda paste works well too. These simple methods restore your tools quickly without harsh chemicals.
What Is the Best Way to Remove Rust from Tools Quickly?
Using a mixture of vinegar and salt is one of the most effective and affordable methods. Simply submerge the rusty tools overnight, then scrub off the loosened rust with steel wool. For stubborn rust, a commercial rust remover like Evapo-Rust gets the job done fast and safely.
Can WD-40 Remove Rust from Tools?
Yes, WD-40 can help loosen light surface rust on tools. Spray it on the affected area, let it sit for a few minutes, then scrub with a clean cloth or brush. It also works well as a protective layer to keep tools rust-free after cleaning.
How to Remove Rust from Tools Fast Without Harsh Chemicals?
You can use natural options like white vinegar, lemon juice with salt, or even a raw potato with baking soda. Soak the tool for a couple of hours, then scrub with a stiff brush or steel wool. These gentle methods are safe for your tools and the environment.
How Long Does It Take to Remove Rust from Tools?
The time depends on how bad the rust is, but most methods take between 30 minutes and a few hours. Light surface rust often comes off in under an hour with a simple vinegar soak. Heavier rust may need overnight soaking or a repeat treatment to fully restore the tool.
How Do You Keep Tools from Rusting Again After Cleaning?
Always dry your tools thoroughly after cleaning and store them in a low-humidity area. Applying a thin coat of oil, such as camellia oil or WD-40, creates a protective barrier against moisture. Storing tools in a toolbox or hanging them on a wall also helps prevent future rust buildup.